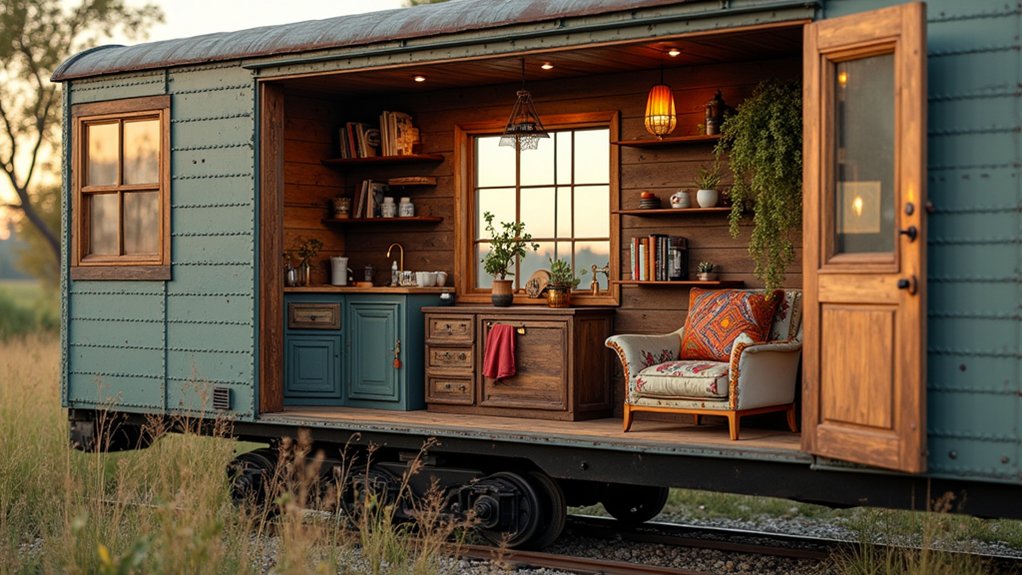

You can turn a vintage railway carriage into a compact, code-aware home, but you’ll need to plan beyond aesthetics. You start with zoning and site access, then choose the right coach or wagon for width, window placement, and structural integrity. You’ll map utilities next—12V/240V electrics, insulation, ventilation, and fire safety—before you commit to plumbing and drainage. The catch is that one early choice can lock in your entire layout…
Can You Legally Live in a Railway Carriage?
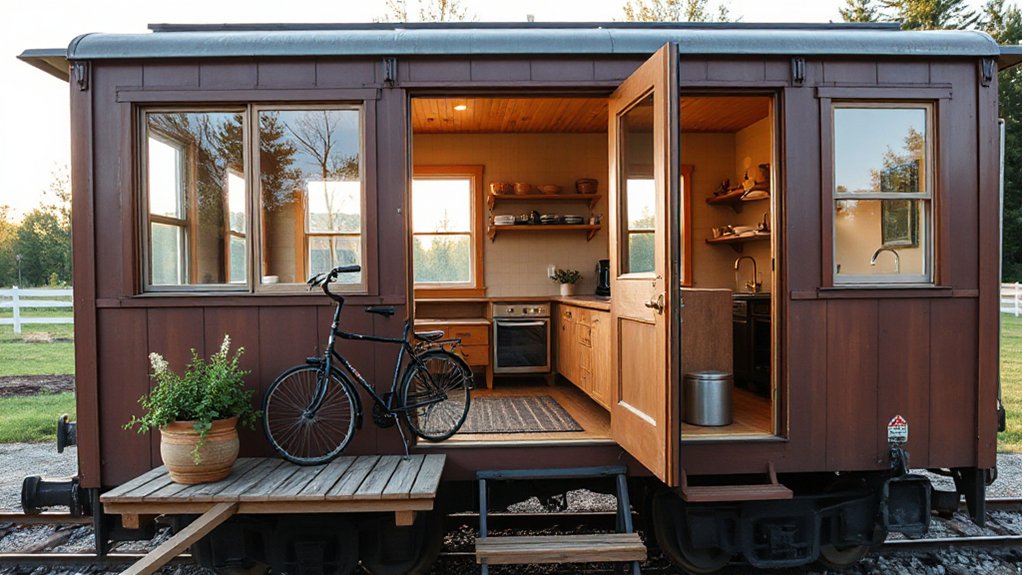
A railway carriage can be a legal full-time home, but only if you treat it like any other dwelling and meet the planning, zoning, and building-code rules that apply where you park it. You’ll typically need a change-of-use or dwelling approval, plus inspections for structure, fire egress, smoke/CO alarms, and safe electrical work (often to current standards).
You must document potable-water supply, wastewater handling, and ventilation; many authorities also require insulation, glazing, and minimum room heights to meet habitability rules. If it’s historic, you may need heritage sign-off before cutting openings or removing fittings.
Treat the shell like adaptive reuse: preserve Vintage charm while upgrading interior decor with compliant materials, flame ratings, and certified appliances. Keep receipts and as-built plans for audits.
Where Can You Site a Railway Carriage Home?
Next, map access: a drivable, weight-rated route for delivery; turning radius; crane pad; and year-round emergency access.
Confirm utilities—legal septic capacity, potable water source, and grid interconnection—or document off-grid systems for permitting.
Screen hazards: floodplain, wildfire interface, landslip, and coastal corrosion zones.
Align your artistic customization with local design codes, screening, and heritage overlays.
How to Buy the Right Railway Carriage (Coach vs Wagon)
Once you’ve locked in a compliant site and a deliverable access route, the carriage itself becomes the biggest driver of cost, approvals, and liveability—so choose between a passenger coach and a freight wagon with your end-use and code pathway in mind.
Coaches suit habitable conversion: you’ll get windows, corridor geometry, and existing partitioning that can support egress planning, daylighting targets, and “Vintage charm” with less cutting. Verify underframe corrosion, bogie condition, brake gear removal scope, and asbestos lead-paint history before you buy.
Wagons price lower and offer a clean shell, but you’ll add openings, insulation build-ups, vapour control, and fire-rated linings to reach “Modern amenities” and comfort.
Prioritise units with intact roof structure, straight sidewalls, and clear title; request engineering records and gauge dimensions.
Moving and Setting a Railway Carriage on Foundations
Once you’ve picked your carriage, you’ll plan the move like an oversized modular: route surveys, crane access, axle loads, and the right oversize transport permits and escorts.
You’ll also prep foundations to spec—engineered pads or piers with verified bearing capacity, drainage, and anchor points—so the chassis lands where you need it.
When you set it, you’ll lift and crib carefully, then level to tight tolerances with shims or adjustable supports so doors, glazing, and service runs don’t fight you later.
Transport Logistics And Permits
Before you order a crane or book a low-loader, map the carriage’s route and regulatory load path so you don’t get stalled by a single bridge clearance or permit mismatch. Get the exact gross weight, axle loads, and overall envelope (length, width, height), then run a swept-path check for tight turns, overhead lines, and soft verges.
Apply early for oversize/overweight permits, rail-crossing consents, and police escorts if thresholds trigger; confirm travel windows, curfews, and weather restrictions.
Specify lifting points and spreader beams in the method statement so you don’t crush vintage framing needed for Historical preservation.
Remove loose Interior decor, glazing, and fittings, then photograph and tag everything for reinstallation.
Insure with transit, lift, and third-party cover.
Foundation Prep And Leveling
Because a carriage’s steel underframe won’t forgive twist, you’ll get better long-term fit and fewer door-and-window issues if you treat the foundations like precision equipment pads, not a casual shed base.
Start with a geotech check and compaction to spec, then set four to six piers on frost-depth footings or a slab with embedded plates.
Snap a datum line, laser-level each bearing point, and allow shimming via galvanized packs, not timber.
When you crane the body in, land it on temporary dunnage, verify cross-level within 2 mm/m, then torque down hold-downs and fit neoprene isolation pads to cut vibration.
You’ll protect historical preservation details and keep interior decor finishes crack-free as seasonal moisture shifts.
Add drainage swales and rodent-proof skirting.
Railway Carriage Layout: Zones, Width, and Flow
Although a railway carriage gives you a long, elegant footprint, the layout only works if you treat it like a high-performance corridor plan: define clear zones, protect usable width, and engineer a smooth circulation line from end to end.
Set a primary aisle at 650–750 mm clear, then lock “hard” services (kitchen, bath, storage) along one side to keep the other side flexible. Use sliding or pocket doors to avoid swing conflicts, and keep furniture depth to 450–600 mm so you don’t choke the passage.
Create three zones—entry/utility, living/sleeping, and work/dining—using ceiling tracks, curtains, or half-height joinery.
Preserve Vintage charm with restored luggage racks, but align sightlines to the windows so you’re always oriented to scenic routes.
Insulation, Ventilation, and Condensation Control
A clean corridor layout keeps the carriage feeling effortless, but the shell still has to perform like a modern micro-home, which means you’ll manage heat loss, airflow, and moisture as one system.
Start with continuous thermal insulation: high-density PIR or sheep’s wool between ribs, plus a thermal break battens to stop cold-bridging at steel frames. Tape every seam and gasket around windows to lock in performance.
Then handle airflow regulation with a balanced approach: a compact MVHR or quiet inline fan paired with trickle vents so you exchange air without stripping heat.
Put a smart vapor control layer on the warm side, but keep a vented cavity behind exterior cladding so any moisture can dry outward.
Monitor humidity; aim for 40–55% RH year-round.
How to Wire and Light a Railway Carriage Safely
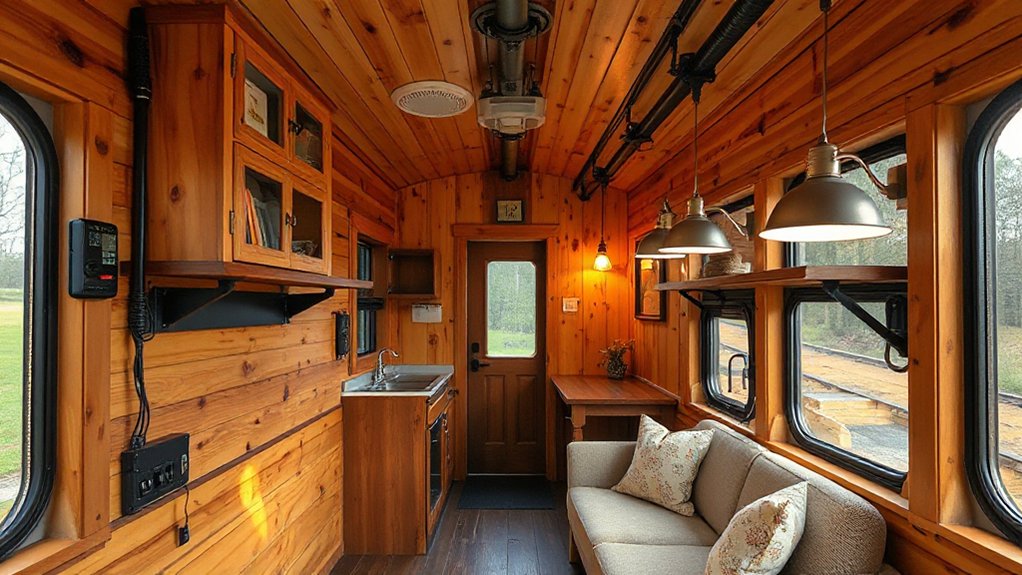
You’ll start by mapping your electrical load—HVAC, induction cooking, hot water, and outlets—so you can size the service, breakers, and any inverter/shore-power changeover without nuisance trips.
Next, you’ll run code-compliant cable routes with proper bonding and grounding to the carriage body, add RCD/GFCI protection, and use gland-sealed penetrations to handle vibration and moisture.
Then you’ll layer a lighting plan that mixes low-glare task lighting with warm-dim LEDs, 24V options for efficiency, and vibration-rated fixtures that suit the carriage’s tight clearances and aesthetic.
Electrical Load Planning
Before you pull a single cable, map the carriage’s electrical loads like a miniature commercial fit‑out: list every circuit (lighting zones, outlets, galley kit, HVAC, water pump, chargers), record each device’s running watts and surge/startup amps, then size your supply (shore power, generator, or solar‑battery inverter) with at least 20–25% headroom.
Convert watts to amps (A = W/V) for 230V or 120V, then total diversified demand: assume not everything runs at once, but keep worst‑case for HVAC plus kitchen.
Split essentials onto a backed‑up bus (fridge, pump, comms) if you’re leaning on solar power.
Choose LED lighting to support Vintage decor without high draw.
Document duty cycles, peak windows, and future add‑ons (EVSE, induction hob) now.
Safe Wiring And Grounding
Once you’ve locked in the load schedule, treat wiring and grounding in a railway carriage like a hybrid of RV practice and small‑commercial code: run a clearly labeled distribution board with RCD/GFCI protection, bond all exposed metalwork (car body, steps, handrails, appliance frames) to a single protective earth point, and keep neutral–earth separation where your supply requires it (especially with inverters and shore power).
Route cables in steel conduit or fire-rated trunking through vibration zones, add grommets at every penetration, and derate conductors for insulation and ambient heat. Use ferruled terminations, torque-labeled lugs, and strain relief on flexible tails.
Install surge protection at the service entry, plus DC fusing if you’ve got batteries. Verify polarity, continuity, and insulation resistance, then document test results for Electrical safety and repeat Grounding techniques checks annually.
Lighting Design And Fixtures
Although a railway carriage reads like a single room, lighting needs to behave like a zoned electrical system: split circuits for task, ambient, and emergency/egress, then wire each run to match vibration, metalwork, and moisture risk.
Run tinned copper, fine-strand cable in conduit or trunking; crimp ferrules, use locking connectors, and add drip loops near windows and doors. Choose 24V DC LED runs with a fused distribution block and a bonded, isolated driver to reduce shock risk on metal skins.
Mount fixtures with rivnuts or vibration-rated screws and use grommets at every pass-through. Blend Vintage decor with filament-style LEDs, but keep CRI 90+ and tune CCT to your color schemes.
Add PIR night lights at steps and an illuminated exit path on a dedicated breaker.
Plumbing Options: Tanks, Mains, and Drainage
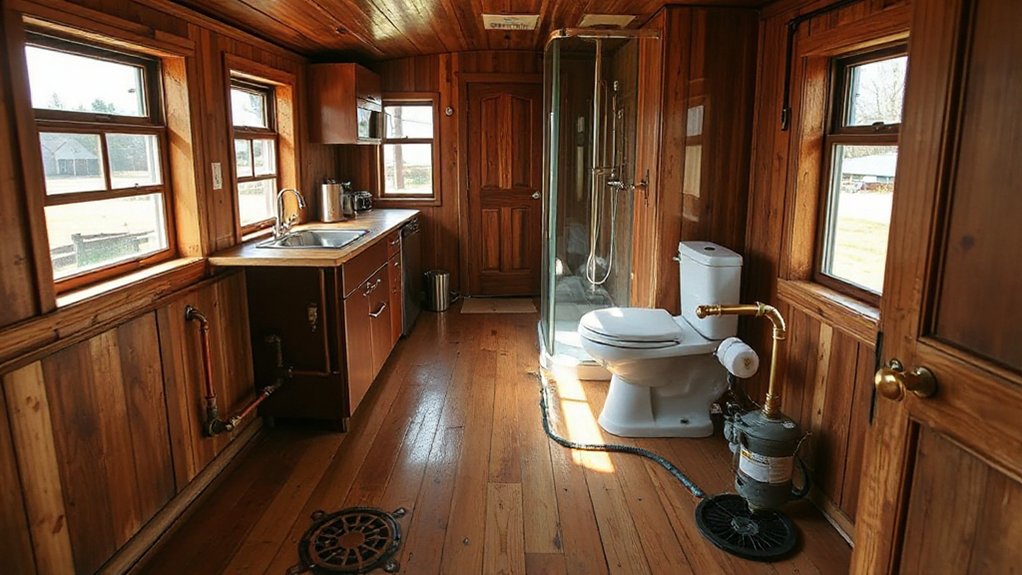
If you’re turning a railway carriage into a livable tiny home, you’ll need to decide early whether your plumbing runs off onboard tanks, ties into mains water and sewer, or uses a hybrid setup with smart monitoring.
Tanks give siting freedom, but you’ll need freeze protection, level sensors, and a pressure pump with accumulator to smooth flow. For water conservation, pair low-flow fixtures with leak detection and a real-time meter.
Mains hookups simplify supply and drainage, yet you must manage flexible connections, backflow prevention, and vibration-tolerant pipe supports.
For drainage, you can run gravity fall to a sewer point, or use a macerator pump when slope’s limited.
Hybrid systems are trending: smart valves, telemetry, and Solar power-backed pumps keep essentials running during outages or remote stays.
Kitchen, Bathroom, and Storage Ideas That Fit
You’ll spec a compact galley kitchen that keeps the work triangle tight, using induction, an under-counter fridge drawer, and slide-out prep surfaces to preserve aisle clearance.
You’ll compact the bathroom with a wet-room layout, wall-hung fixtures, a cassette or macerating toilet, and a pocket door to eliminate swing loss.
You’ll then stash storage everywhere with toe-kick drawers, overhead rail racks, bench-seat compartments, and magnetic wall panels that lock gear down for travel.
Compact Galley Kitchen Hacks
When a railway carriage narrows to a corridor-width footprint, a galley kitchen has to work like a marine fit-out: one continuous run of cabinetry, hardwearing surfaces, and zero dead zones.
You’ll spec a 20mm compact laminate or stainless worktop, radius the front edge for hip clearance, and keep the aisle at 600mm minimum.
Use a two-burner induction hob, a combi microwave-oven, and an undercounter fridge on a single 13A circuit, with a dedicated RCD.
Fit full-extension drawers instead of base cupboards, add toe-kick pull-outs, and mount a magnetic knife rail plus fold-down prep shelf.
Blend Vintage decor (brass pulls, enamel splashback) with minimalist design via flat fronts and concealed bins.
Use LED strip task lighting.
Space-Smart Bathroom Solutions
A carriage galley teaches you to eliminate dead space, and the bathroom needs the same discipline in an even tighter envelope. Start with a wall-hung toilet and a compact in-wall cistern to free floor area and simplify cleaning. Specify a corner basin or a trough-style sink with a single-lever mixer and aerator to cut splash and water use.
Choose a wet-room layout: linear drain, continuous floor waterproofing, and a frameless glass screen that slides, not swings. Run a thermostatic valve to stabilize temperature and protect your plumbing. Use large-format, slip-rated tile to reduce grout lines and maintenance, then add Vintage charm through unlacquered brass hardware and ribbed glass.
Your interior decor stays cohesive when you repeat the same finishes as the galley and keep lighting at 3000K.
Hidden Storage Everywhere
Because every inch in a rail carriage has to earn its keep, hidden storage becomes your primary planning tool—especially in the galley and bath where clear circulation matters as much as capacity.
You’ll spec toe-kick drawers under base cabinets, then run a continuous stainless rail for magnetized knife blocks and spice tins to keep counters clear.
Use lift-up bench lids with gas struts for pantry bins, and switch to a pull-out larder sized to the carriage’s narrow bay.
In the bathroom, you can recess mirrored cabinets between studs, add a trapdoor plinth for spare towels, and mount a vanity with a false back for plumbing access.
Match birch ply fronts with brass pulls for Vintage charm, then wrap doors in patterned laminate for Artistic decor.
What a Railway Carriage Conversion Costs (Real Ranges)
Although the headline price of a retired carriage can look like the whole story, your real budget lives in transport, compliance, and build-out—so expect wide ranges depending on condition, location, and how “off-grid” you go.
You might pay $5k–$25k for the shell, but craned lifting, escort permits, and haulage can add $8k–$40k+ depending on distance and access.
If you need engineering sign-off, insulation upgrades, fire separation, and egress compliance, set aside $5k–$20k.
A basic fit-out with Vintage charm—restored timber, period hardware—runs $20k–$60k.
If you want Modern amenities (heat pump, solar+battery, induction, smart HVAC, composting WC), expect $50k–$150k+.
Contingency: 10–20% for corrosion, glazing, bogie removal, and weatherproofing.
Conclusion
You’ve seen that turning a railway carriage into a livable home is equal parts regulation, logistics, and systems engineering. You’ll get the best results when you treat it like a compact-build: verify planning use, spec insulation and fire safety, and design wiring and plumbing around tight clearances. One stat to keep you honest: space-per-person keeps shrinking—average new UK homes dropped from ~88 m² (1970s) to ~67 m² today—so your carriage can feel on-trend, not cramped.