
You’re not just fitting kitchens and bedrooms into a stone shell—you’re balancing heritage constraints with modern performance targets. Start by checking structural stability, moisture paths through thick walls, and whether planning will treat the barn as a change of use or a heritage asset. Then you’ll need an insulation and airtightness strategy that won’t trap damp, plus discreet services, glazing choices, and ventilation sized for big volumes. The next step changes everything…
Is Your Stone Barn Suitable to Convert?
Before you fall in love with glossy renders, it’s worth asking: can your stone barn actually take a modern conversion without costly surprises? Start with a measured survey: you’ll check wall plumb, crack patterns, and whether lime mortar has washed out.
You’ll confirm roof spread, purlin rot, and truss bearing points, because new insulation loads can push tired timbers past capacity. Assess ground conditions and drainage; rising damp, shallow footings, and buried drains often dictate the build strategy.
Map openings and span lengths to see if you can keep primary bays readable for Historic preservation while still fitting glazing and services. Finally, test for contamination from Agricultural heritage—fuel, slurry, vermin—and price remediation early, before design decisions lock in budgets.
Planning Rules for Stone Barn Conversions
Once you’ve confirmed the barn’s basic suitability, you’ll need to map the planning route: check whether Permitted Development Rights (often Class Q) apply and where they cap works like extensions, new openings, or structural rebuilds.
If PD doesn’t fit—or your design pushes beyond it—you’ll need full planning and Change of Use consent, with supporting surveys that prove the building’s existing fabric can accommodate conversion.
If the barn’s listed or in a sensitive setting, Listed Building constraints will dictate materials, detailing, and even repair methodology, so you can’t assume “like-for-like” changes will get a pass.
Permitted Development Rights
Although many stone barn conversions still need full planning consent, you may be able to rely on Permitted Development (PD) rights—most commonly the Class Q “agricultural to dwelling” route—to change use and carry out a defined set of building operations without a traditional planning application.
You’ll need to confirm the building’s lawful agricultural use and qualifying dates, plus whether the site sits in Article 2(3) land, a National Park, or other constrained areas where PD can be limited.
Keep interventions “reasonably necessary”: think envelope repairs, new openings, and services, not wholesale rebuilds.
For historic preservation, document existing fabric and specify like-for-like stonework and lime mortars.
For sustainability considerations, you can integrate discreet insulation, airtightness layers, and low-carbon heat, but avoid external alterations that could be judged disproportionate or visually intrusive.
Change Of Use Consent
Where Permitted Development doesn’t apply—or you want flexibility beyond Class Q’s tight limits—you’ll need change of use consent through the full planning route. The key test is whether your stone barn can become a dwelling without undermining local countryside policy.
You’ll submit a Householder or Full application with a Planning Statement, Design and Access narrative (where required), and scaled drawings showing massing, openings, glazing ratios, and materials. You’ll need to evidence the building’s lawful use and structural capability, plus access, ecology, drainage, and flood risk where relevant.
Address landscape impact with restrained contemporary insertions and dark-sky lighting. Tie your proposal to local plan policies by demonstrating Historical significance and Agricultural heritage, while proving the scheme keeps rural character and delivers sustainable reuse.
Listed Building Constraints
Full planning consent may secure the change of use, but listed status changes the rules of the game: you’ll also need Listed Building Consent for any works that affect the building’s special architectural or historic interest, inside or out.
You can’t assume “like-for-like” repairs are exempt; repointing, window alterations, roof coverings, or new openings may trigger consent. Expect conditions requiring lime mortars, breathable insulation build-ups, and repair-before-replace policies to support Heritage preservation.
You’ll need a heritage statement, measured survey, and method statements for dismantling, stitching cracks, or timber repairs.
To keep a contemporary brief, specify reversible insertions, discreet services routes, and minimal intervention detailing.
Align aesthetic restoration with energy upgrades by using secondary glazing, low-profile underfloor heating, and carefully routed MVHR ducting.
Early pre-app advice cuts redesign cycles.
Survey First: Structure, Damp, and Foundations
Before you commit to layouts and glazing, you’ll commission a structural survey to confirm load-bearing integrity—check wall plumb, stonework bonding, lintel performance, and any roof spread at the wall heads.
You’ll also map damp pathways with moisture profiling and salt testing, then trace how rainwater goods, surface falls, and ground levels drive capillary rise.
With drainage CCTV and trial pits for foundation depth and bearing strata, you can specify targeted repairs and breathable build-ups that meet modern performance expectations without trapping moisture.
Assess Load-Bearing Integrity
Although stone barns often look indestructible, you can’t assume the walls, footings, or floor build-up will tolerate modern loads until a structural survey proves it. You’ll map load paths from new roof insulation, solar arrays, mezzanines, and glazed openings, then verify stone thickness, core voids, and mortar cohesion.
Ask your engineer to check lintels, arch thrust, and gable stability, plus differential settlement indicators like stepped cracking and racking. You may need structural reinforcement: concealed steel frames, stitched masonry, ring beams, or underpinning, sized to Eurocode/UK NA assumptions and your proposed spans.
Keep historical preservation in view by choosing reversible interventions, matching lime-based materials, and minimizing chasing for services. Treat wind uplift and lateral restraint seriously.
Investigate Damp And Drainage
Once you’ve confirmed the barn can take new loads, treat moisture as the next constraint, because damp will undermine both the masonry and any high-performance retrofit you add. Start with a targeted damp assessment: map tide marks, salts, and spalled faces; log RH and temperature; and use carbide or gravimetric testing to separate rising damp from condensation and lateral ingress. Check roof leaks, parapet details, and failed pointing that drives wind‑rain into rubble cores.
Next, audit ground levels and water paths. You’ll often need drainage solutions that respect breathability: regrade to fall away, add French drains with clean stone and geotextile, and keep impermeable membranes off historic walls. Specify lime mortar repointing, capillary breaks under new slabs, and ventilated floor build-ups so moisture can exit. Validate with winter monitoring.
What a Stone Barn Conversion Costs
Because a stone barn rarely comes with modern services, compliant structure, or reliable weatherproofing, your conversion budget needs to cover far more than finishes. You’ll typically spend heavily on enabling works: surveys, heritage statements, and contingency for hidden defects.
Allow for barn restoration and stone preservation, including repointing in lime mortar, stitching cracks, replacing spalled stones, and installing breathable insulation systems that won’t trap moisture.
Structural upgrades often include new foundations, steelwork, and roof renewal with membranes and insulation to current U-values.
Services add up fast: new water, power, drainage connections, MVHR, underfloor heating, and smart controls.
Don’t forget access, landscaping, and external lighting.
For costs, expect £2,500–£4,500 per m² in the UK, higher with listed constraints and bespoke glazing.
Layout Ideas for Thick-Walled Barn Conversions
After you’ve allowed for the heavy enabling works in a stone barn conversion budget, the plan layout becomes the next big lever for performance and comfort—especially with 600–900mm thick walls that swallow floor area and complicate services runs.
Use a “warm core” strategy: cluster kitchen, utility, WC, plant, and risers centrally so you shorten pipework, boost hot-water response, and simplify airtightness detailing.
Treat wall thickness as usable depth by carving recessed storage, bench seats, and integrated joinery that preserves circulation widths.
Push primary living spaces to the sunniest elevation, then zone quieter rooms behind for acoustic buffering.
Plan interior lighting early: layer uplighting in reveals, add track runs on steelwork, and avoid shadowy corners.
For landscape integration, align thresholds with terraces, sightlines, and wind-sheltered outdoor rooms.
How to Add Windows and Rooflights Sensitively
Start by working with the barn’s original openings—you’ll get better planning outcomes and keep the façade’s proportions intact while upgrading glazing performance with slim-profile frames and deep reveals.
Where you need extra daylight, you can add rooflights that sit low and align with the roof plane, using conservation-style units, flush flashing kits, and carefully matched slate or tile detailing.
You’ll balance light levels, thermal performance, and heritage character by keeping new penetrations minimal, consistent, and visually quiet from key viewpoints.
Respecting Existing Openings
When you’re converting a stone barn, treat every existing opening as part of the building’s structural rhythm, not a blank canvas for bigger glazing. Survey head heights, jamb widths, and lintel types, then set new frames behind the reveal so the masonry reads as original. Specify slimline steel or timber sections, matte finishes, and deep cills to preserve shadow lines.
If you must enlarge, do it minimally and only where loads allow, upgrading lintels and tying into existing bond patterns.
Align glazing positions with interior decor sightlines and furniture zones, so daylight supports circulation and privacy. Outside, coordinate openings with landscape design: frame key views, avoid light spill to wildlife corridors, and match window proportions to façade bays.
Use conservation-style glazing bars only where historically justified.
Discreet Rooflight Integration
Openings in thick stone walls can only take you so far, so you’ll often rely on rooflights to pull daylight deep into the plan without reworking historic masonry. Keep them visually quiet: specify flush, conservation-style frames, align them with rafter bays, and match external finishes to slate or standing-seam metal.
Get the skylight design right by setting the upstand low, insulating it continuously, and using warm-edge spacers and low-iron glass for clean light. You’ll prevent condensation by detailing a vapour-tight internal line and a drained, ventilated counter-batten zone.
Position rooflights above circulation spines, stair voids, or kitchen islands, then tune solar gain with fritted glass or external blinds. If you’re adding a roof garden, choose walk-on units with anti-slip outer panes and robust structural trimming.
Insulation and Airtightness Without Trapping Damp
How do you push a centuries-old stone barn toward Passivhaus-level performance without creating a moisture trap? You start with Historical preservation: accept that solid masonry wants to dry both ways, then design every layer to stay vapour-open.
Your Material selection should favour capillary-active insulation (wood fibre, cork, hemp-lime, or calcium silicate) and lime-based plasters that buffer humidity instead of locking it in.
You’ll tighten airtightness with an interior “smart” vapour control membrane or airtight plaster layer, taped meticulously around joists, window reveals, and service penetrations. Keep adhesives compatible with lime and dusty substrates; prime where needed.
Model interstitial condensation (WUFI) before final specs, especially at wall-to-floor junctions and behind retained stone. Detail thermal breaks at lintels, and keep drainage and splashback control outside.
Heating and Ventilation for Large Barn Spaces
Where do you even start with heating and fresh air in a barn-scale volume that’s airtight, heavily insulated, and still full of thermal lag? You size systems to steady temperatures, not quick blasts: low-temperature underfloor loops or oversized radiators paired with an air-to-water heat pump keep surface temps even and cut stratification. Add smart zoning and weather compensation so the slab’s slow response doesn’t overheat.
For ventilation, you’ll want MVHR with high static-pressure capacity, rigid duct runs, and careful supply/return placement to avoid dead zones in double-height bays. Commission it with airflow testing and CO₂ targets.
Coordinate interior lighting with diffuser locations to prevent drafts in seating areas. Tie landscape design to intake/exhaust positions, keeping them sheltered, quiet, and clear of snow and planting debris.
Modern Details That Keep Barn Character
Because a converted barn can tip into “new-build in old walls” fast, you’ll want modern details that read quiet and intentional while letting the structure stay in charge. Keep joinery shadow-gap clean, then stop plaster short of stone so edges stay honest. Choose slim-frame, thermally broken glazing in dark bronze, and align mullions to existing bays so openings feel original.
For floors, run wide oak or polished limecrete with an understated matte sealer; hide underfloor manifolds in a utility cupboard for Modern amenities without visual noise. Specify flush, paint-grade skirting or none, and use recessed base channels for LEDs instead of downlights.
Pick blackened steel handrails, concealed fixings, and linear slot vents. That restraint preserves Rustic charm while meeting airtightness, acoustics, and durability targets.
Picking the Right Contractor for Your Barn Conversion
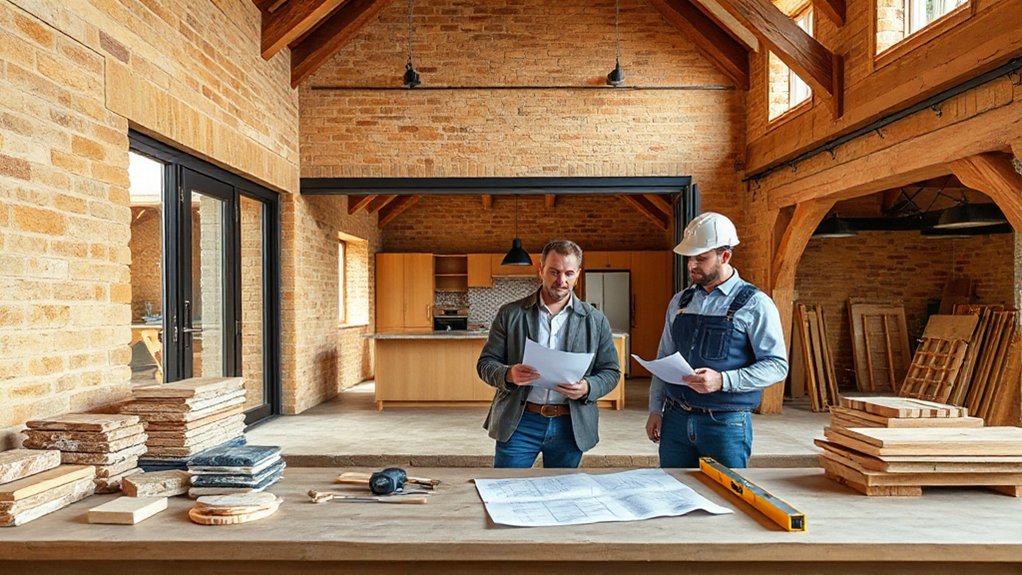
Those quiet modern moves—shadow-gap plaster lines, slim thermally broken glazing, limecrete floors, and hidden services—only land if your contractor can execute heritage fabric and high-performance detailing to spec. Vet firms with proven barn conversions, not just extensions, and ask for moisture-risk strategy, airtightness targets, and junction drawings.
You’ll want a site lead who understands stone consolidation, breathable insulation, and how to thread MVHR ducts without cutting principal trusses. Check they’ll coordinate engineer, conservation officer, and Building Control, and price provisional sums honestly.
Insist on mock-ups for lime pointing, window reveals, and Interior lighting channels so dimming, glare control, and cable routes stay clean. Finally, choose someone who sequences drainage, retaining edges, and Landscape design early, protecting access, levels, and planting from heavy plant.
Conclusion
You’re like a shepherd rehousing a weathered flock: you test the barn’s bones with surveys, then guide planning consent, costs, and contractor choice into line. You stitch in vapour-open insulation, airtight layers, and discreet services so moisture can still “breathe.” You carve layouts that respect thick walls, right-size glazing, and tune MVHR plus low-temp heating for volume. Do it well, and the old stone shell becomes a high-performance home with heritage intact.