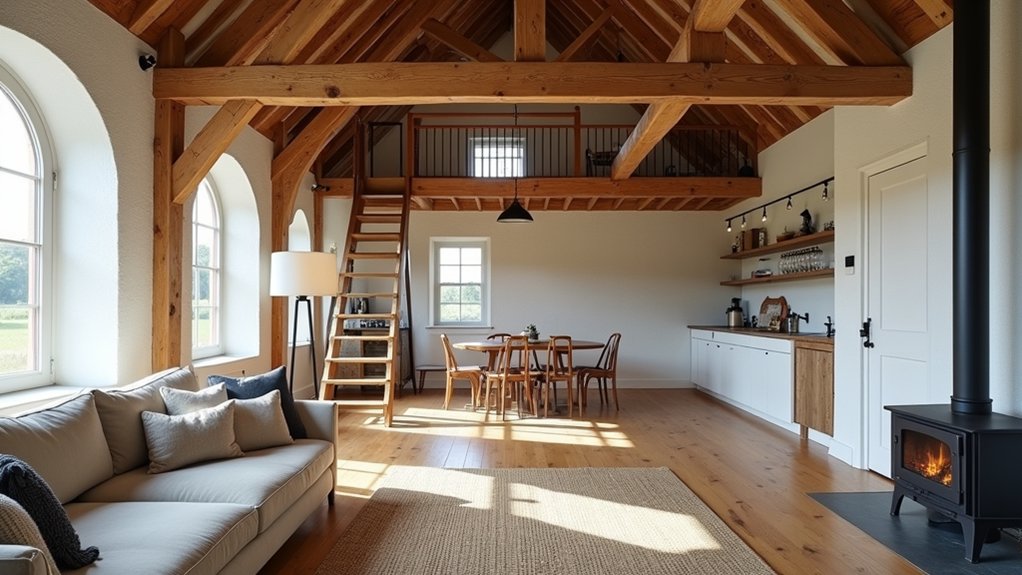

You’ll verify the structure, map the loads, and lock in permits. You start by checking joists, beams, and connections for deflection and uplift, then confirm code-required egress, stair geometry, and guard height before you place walls or run utilities. You zone the loft for sleep, work, and storage, pushing built-ins into low edges and reserving the ridge for circulation and light. Next you’ll need to decide where the services can run without weakening the frame…
Verify Structure, Loads, and Permits
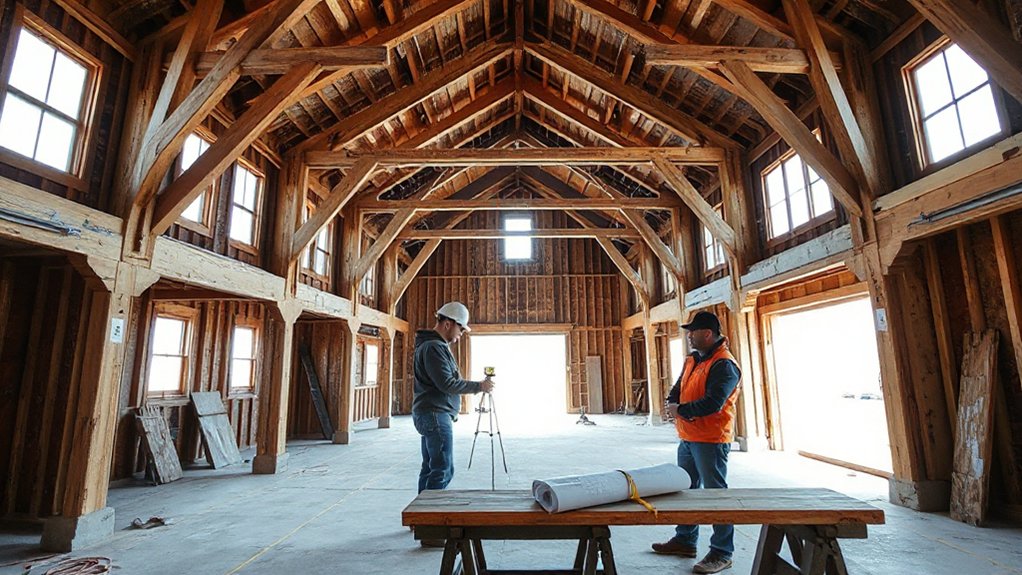
Before you sketch layouts or run new utilities, confirm the loft’s framing can safely carry its new live loads and any added dead load from floors, insulation, drywall, and furniture. Measure joist size, species, spacing, span, and bearing length; inspect for rot, insect damage, sag, splits, or altered members.
Verify load paths to posts, beams, and foundations, and reinforce with sistered joists, LVLs, blocking, or new footings where calculations show overstress. Document fasteners and connection details; upgrade hangers and straps to maintain Structural integrity under lateral and uplift forces.
Next, meet local Building codes: egress, stairs, guards, fire separation, insulation, and snow/wind criteria. Pull permits, schedule inspections, and keep stamped engineer drawings on site.
Plan Loft Zones Around Daily Use
With the structure verified and code items on track, map the loft into zones based on how you’ll use it hour‑to‑hour, not just how you want it to look. Start with circulation: keep a clear spine from stairs to egress, then cluster high‑use tasks along it.
Put sleep where morning light and privacy align; buffer it with storage or a wardrobe wall. Place work or reading away from the noisiest rafters and traffic to control loft acoustics; add rugs, soft panels, and bookcases as absorbers.
Assign a flexible zone for guests, yoga, or crafts using a fold‑down desk and nesting seating. Reserve a clean wall for loft artwork, sized to viewing distance and protected from glare.
Mark each zone with lighting layers and movable screens.
Layout Utilities: Electrical, Plumbing, and Internet
You’ll map electrical load first, then place the panel, subpanel, and dedicated circuits where you can keep runs short and service access clear.
You’ll route plumbing on the wet-wall line—stack supply and drain/vent vertically, maintain slope, and keep cleanouts reachable to avoid future tear-outs.
You’ll plan internet like a utility: run conduit or raceway to key zones, centralize the modem/router, and pre-pull Cat6 plus a few spare drops for expansion.
Electrical Load Planning
Although a barn loft can feel like one open room, its electrical demand behaves like a small house, so plan loads circuit‑by‑circuit instead of outlet‑by‑outlet.
Start with a panel schedule: general lighting, general receptacles, HVAC, kitchen/coffee bar, laundry, and shop tools each get dedicated breakers.
Calculate continuous loads at 125%, then add nameplate watts for fixed equipment; you’ll size feeders and subpanels accurately.
Split lighting fixtures across at least two circuits so one trip doesn’t black out the loft, and keep electrical outlets on separate circuits from high‑draw appliances.
Use 20A small‑appliance circuits where you’ll run kettles, microwaves, or heaters.
Place GFCI/AFCI where code requires, and label everything for fast troubleshooting and safe expansion later.
Plumbing And Internet Routing
A smart utility chase plan keeps plumbing runs short, protects lines from freezing, and gives your network a clean backbone without tearing open finished walls later.
Stack Plumbing fixtures above the existing wet wall, then center a 2×6 chase for supply, drain, and vent so you don’t notch structural members. Insulate and air-seal the chase, add shutoffs at branch points, and pitch drains 1/4 inch per foot to avoid slow traps.
Use PEX with homeruns to a compact manifold for serviceability and minimal joints.
For internet, run 1-inch conduit with pull string from your demarcation point to a small media panel, then star Cat6 cables to work, TV, and AP locations.
Verify Internet providers’ entry points before closing ceilings.
Insulate and Size HVAC for Four Seasons
Once you’ve framed and air‑sealed the loft shell, lock in four‑season comfort by pairing high‑R, moisture‑managed insulation with HVAC sized to the actual heating/cooling loads—not the square footage.
Use insulation techniques that fit your assembly: closed‑cell spray foam at rim joists and knee walls, dense‑pack cellulose in rafter bays, and continuous rigid foam to cut thermal bridging.
Maintain a ventilated roof deck where required, and add a smart vapor retarder to keep winter condensation off cold sheathing.
Seal penetrations with gaskets and fire‑rated foam so the R‑value performs.
For HVAC sizing, run Manual J, then pick variable‑speed mini‑splits or a small ducted heat pump with low‑static ducts.
Balance rooms, size returns, and commission airflow and refrigerant charge.
Add Skylights, Dormers, and Loft Windows
You’ll set skylights where they capture consistent daylight without overheating the loft, aligning openings with roof framing and controlling glare with orientation and shading.
You’ll size and frame dormers to meet headroom and egress targets while managing snow load, flashing continuity, and thermal bridging at the roof-wall junction.
You’ll add operable loft windows high/low to drive cross‑ventilation and stack effect, cutting humidity and reducing HVAC runtime in shoulder seasons.
Skylight Placement Strategies
Because barn lofts often sit under deep roof planes with limited wall area, skylight placement becomes the primary tool for controlling daylight, ventilation, and perceived ceiling height.
Put units between rafters to avoid structural rework, and align openings over circulation paths so you don’t sacrifice headroom at seating or beds.
Use north-facing skylights for steady Natural light and minimal glare; use east or west sparingly to limit overheating.
Size glazing to the room’s floor area and specify low‑E, argon-filled units to protect Energy efficiency.
Place operable skylights high on the slope to drive stack ventilation, then pair them with low inlets for crossflow.
Offset multiple skylights to wash both roof planes, reducing contrast and task shadows.
Dormer Design Considerations
While skylights punch light through the roof plane, dormers and loft windows reshape the loft’s usable volume by adding vertical glazing, headroom at the eave line, and more controllable ventilation.
Set dormer width to align with existing bay spacing so you don’t overload rafters or interrupt purlin lines. Specify a header sized for the cut rafters, then tie into collar ties or a ridge beam to keep roof thrust contained.
Choose shed dormers for maximum floor-area gain per linear foot; use gable dormers when you need tighter framing footprints.
Keep cheeks insulated with continuous exterior foam to prevent thermal bridges.
For historic preservation, match sash proportions, trim profiles, and roofing. Use dormer cladding and flashing as aesthetic enhancements, not afterthoughts.
Loft Window Ventilation Benefits
Dormers may give you the headroom and vertical glazing, but they also set up the ventilation strategy that keeps a converted loft comfortable year‑round.
Place operable dormer windows opposite eave or gable openings so you can drive cross‑ventilation with minimal ductwork.
Add a ridge skylight or venting roof window high on the slope to trigger stack effect: warm air exhausts at the top, pulling cooler air in low for steady natural airflow.
Choose top‑hung or center‑pivot loft windows for tight clearances; they open wide without stealing floor area.
Specify insect screens and trickle vents to maintain baseline air exchange when windows stay shut.
These Loft window ventilation benefits cut moisture, reduce overheating, and protect new finishes.
Design Stairs, Egress, and Safe Railings
Where do you start when a loft needs to function like real living space? You begin with code-driven access: size stairs for stair safety, keeping tread depth consistent and riser height uniform.
Choose a space-saving layout—alternating tread or ship’s ladder only where allowed—and keep headroom clear along the walking line.
Anchor stringers to solid framing, not just decking, and add non-slip nosings.
For egress, verify every sleeping or habitable zone has a compliant escape route: an exterior door or an egress window with clear opening, reachable without tools.
Install landings at door swings and stair tops to prevent missteps.
Finish with railings: pick durable railing materials like steel cable, wood, or welded mesh, and set baluster spacing to block falls safely.
Add Privacy With Partitions and Sound Control
Once you’ve locked in safe stairs, egress, and railings, focus on carving out private zones without sacrificing the loft’s open volume. Use half-height partitions or ceiling-hung tracks so air and daylight still move across the span.
Position Privacy screens perpendicular to sightlines from stairs and common seating to block direct views into sleeping or work areas. Choose screens with rigid frames and weighted bases to prevent racking on uneven barn floors.
For sound, treat both separation and absorption: add Acoustic panels on the partition faces and at first-reflection points along the roofline to cut flutter echo. Seal gaps with compressible gaskets at floor contact and along post interfaces.
If you can, stagger panel seams and include a soft curtain layer for additional attenuation.
Build Flexible Storage Into Tight Loft Edges
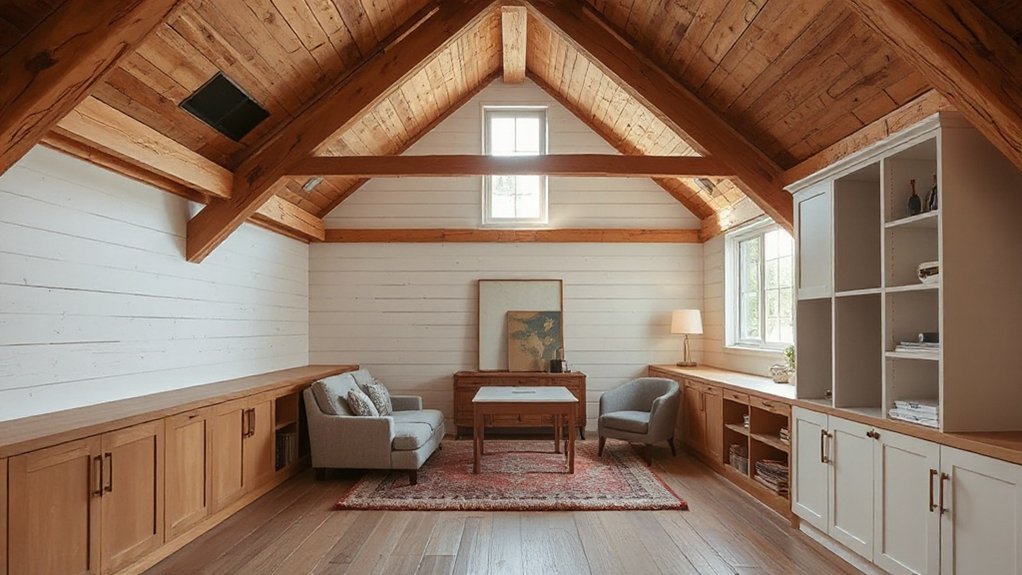
Although the loft edges feel unusable because of low headroom and roof pitch, you can turn them into high-capacity storage by building shallow, modular units that follow the rafter line.
Start by mapping stud and rafter locations, then set a consistent cabinet depth (10–14 inches) so doors clear the walking path. Use a continuous ledger fastened to framing, and hang box modules with French cleats for quick reconfiguration.
Add Flexible shelving on 32 mm pin rows so you can shift shelf heights as needs change. Split long runs with removable dividers to prevent sag and to sort gear by zone.
Choose low-profile pulls, hinged lift-up fronts, or sliding panels where kneeling access is required. Seal gaps with trim to stop dust migration and airflow leaks.
Choose Rustic Finishes and Adaptable Furniture
With the tight-edge storage dialed in, keep the loft feeling open by choosing rustic finishes that hide wear and adaptable furniture that earns its footprint. Specify matte, low-sheen sealers on reclaimed pine and whitewashed oak so scuffs read as patina, not damage. Use blackened steel brackets and hardware for high load ratings without visual bulk.
On floors, pick wide planks with wire-brushed texture to mask grit tracked from stairs.
For adaptable furniture, prioritize pieces with dual-duty dimensions: a drop-leaf table that clears a 36-inch circulation path, a sleeper sofa with a shallow 34-inch depth, and nesting stools that park under a console. Add a lift-top coffee table with internal compartments and soft-close hinges to prevent slam.
Conclusion
When you transform a barn loft right, you’re not just “finishing a space”—you’re turning rough timbers into a four‑season command center. You’ve verified loads, nailed permits, and routed power, water, and internet like a mini‑infrastructure project. You’ve wrapped it in insulation, sized HVAC, and punched in skylights for daylight overload. You’ve built code‑tight stairs, egress, and railings, then added partitions, sound control, edge storage, and furniture that morphs nonstop.