Adding a toilet to a basement is one of those home improvement projects that seems like it should be simple — it’s just a toilet, after all — until you start investigating the drainage situation and realise that gravity, which handles everything automatically in every other toilet in the house, is working directly against you. A basement sits below the level of the main sewer connection. Waste can’t flow downhill to the sewer because it’s already below it. That single fact is the source of almost all the complexity involved in how to put a toilet in the basement, and understanding how to solve it is where this guide begins.
The good news is that the problem is entirely solvable, with several well-established approaches available at different price points and levels of disruption. Whether you’re finishing a basement as a habitable room, adding a cloakroom to a cellar conversion, or creating a full bathroom to accompany a hot tub installation (more on that in our guide to putting a hot tub in a basement), this guide covers the drainage options, the building regulations requirements, the practical installation steps, and the costs involved.
Understanding the Core Problem: Basement Drainage
In a standard house, every toilet, sink, and shower drains by gravity. Waste flows downhill through pipes of increasing diameter, eventually reaching the soil stack — the large vertical pipe running from roof to foundation — and from there to the underground drain connecting to the public sewer. The fall gradient required for a 110mm soil pipe is 1:40 to 1:80 (roughly a 1cm drop for every 40cm of pipe run) — gentle but consistent, and achievable because the fixtures are above the drain level.
In a basement, the floor level is typically below — sometimes well below — the level at which the underground drain exits the building. A basement toilet’s waste cannot flow downhill to the drain. It has to go up.
There are three main ways to solve this:
- A macerator (upflush) toilet system — the waste is ground into slurry and pumped up through small-bore pipe to the main drain above
- A sewage lifting station — all waste from the basement flows by gravity into a sealed underground chamber, from which it’s pumped up to the main drainage level
- Breaking out the slab for a gravity drain — excavating below the existing basement floor to install conventional gravity drainage at a lower level, connecting directly to the underground drain
Each approach has different costs, different installation disruption, different performance characteristics, and different suitability for different basement situations.
Option 1: The Macerator (Upflush) Toilet
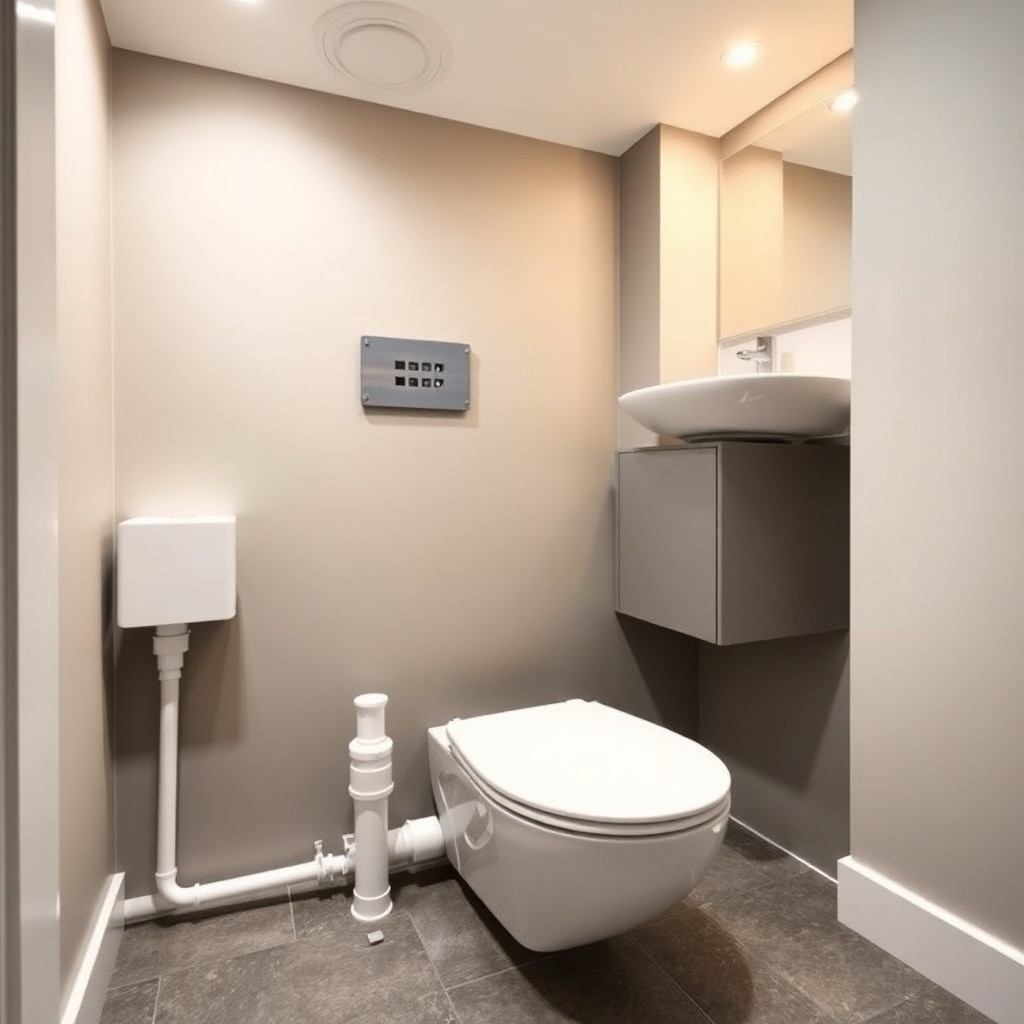
A macerator toilet — sometimes called an upflush toilet or a Saniflo (after the market-leading brand) — is the most commonly chosen solution for basement toilets, and in many situations the most practical one.
How It Works
When the toilet is flushed, waste travels into a compact macerator unit positioned behind or beside the toilet at floor level. Inside the unit, rotating blades grind the waste and toilet paper into a fine slurry. A pump then pushes the slurry through a small-bore pipe (typically 22–32mm diameter) to the main soil stack or directly to the underground drain. The unit can pump waste vertically upward — typically up to 4–5 metres — and horizontally across considerable distances, making it highly flexible in terms of pipe routing.
The macerator unit is compact, self-contained, and requires only:
- A connection to the toilet pan
- A small-bore discharge pipe run to the soil stack or drain
- A standard 13-amp electrical supply (to power the pump and blades)
- A cold water supply to the cistern
No breaking out of the concrete slab. No major excavation. In a basement where the walls and floor are already finished or where disruption needs to be minimised, this is a significant advantage.
The Building Regulations Position
This is the critical point that anyone planning a basement macerator toilet must understand before proceeding. Under Approved Document G of the Building Regulations (specifically clause G 4.24), a macerator toilet is only permitted if there is also access to a WC that discharges directly to a gravity drainage system. A macerator toilet cannot be the only toilet in the building.
The reasoning is straightforward: macerators require electrical power to function. In a power cut, a macerator toilet becomes non-functional. The Building Regulations require that at least one gravity-draining toilet remains available to occupants regardless of power supply.
This means that if your property already has at least one standard gravity-draining toilet — as virtually every UK house does — you can install a macerator basement toilet without issue. The macerator is an additional toilet, and the gravity WC on the ground floor or above satisfies the regulation.
Where the macerator toilet would be the only toilet — for instance, in a standalone basement flat — the regulation is not met, and a different drainage solution is required.
Building Regulations approval is required for the installation. The drainage work falls under Approved Document H, and if the basement space is being converted to habitable use, Part F (ventilation) and Part G (sanitation) are also relevant.
The Macerator’s Limitations
What you can’t flush: Macerator toilets are more sensitive than standard toilets to what goes through them. Sanitary products, baby wipes (including those marketed as “flushable”), cotton wool, and hard objects will damage or jam the macerator blades. In a household where this is likely to be an issue, the maintenance consequences are worth factoring into the decision.
Noise: Macerator units are not silent. The grinding and pumping cycle lasts ten to thirty seconds after each flush and produces a distinctive sound — quieter than it was in earlier generations of product, but audible. In a basement room where the unit is mounted behind a partition or within a cistern unit, this is manageable. In a very small room, it’s more noticeable.
Power dependency: As noted above, no power means no functioning toilet. In properties with frequent power interruptions this is worth considering.
Lifespan: A good quality macerator from an established manufacturer (Saniflo, WC-Pump, SFA) has a typical lifespan of ten to fifteen years with proper maintenance. Budget units have shorter lifespans and less reliable performance.
Macerator Costs
- Macerator unit supply: £300–£800 for a quality unit (Saniflo Saniplus or similar mid-range); £800–£1,500 for premium models with higher pump capacity
- Toilet pan and cistern: £150–£500 depending on specification
- Installation (plumber, electrician, pipework): £600–£1,500
- Total installed cost: approximately £1,200–£3,000 for a macerator WC, or £1,800–£4,500 for a full bathroom suite (adding basin and shower with their own pump connections)
Option 2: A Sewage Lifting Station
A sewage lifting station — also called a sewage pump station or an ejector pump system — is a more robust solution, particularly where multiple fixtures (toilet, basin, shower, washing machine) need to drain from the basement, or where the macerator’s limitations make it unsuitable.
How It Works
A sealed underground tank — the lifting station chamber — is installed beneath or at the perimeter of the basement floor. All basement drains (toilet, basin, shower, utility sink) connect to this chamber by conventional gravity-fall pipework within the basement. When the waste level in the chamber reaches a set point, an automatic submersible pump activates and pumps the accumulated waste up through a rising main to the main sewer or soil stack at the level above.
The key difference from a macerator: a lifting station handles the full range of domestic waste — solids, paper, and grey water from multiple fixtures — in a larger, sealed unit designed specifically for sustained use. It uses a grinder pump rather than the lighter-duty blades of a domestic macerator, making it suitable for higher volumes and more demanding use patterns.
When a Lifting Station Is the Better Choice
Multiple fixtures: If the basement bathroom includes a shower, basin, utility connections, or a washing machine in addition to the toilet, a lifting station handles all of these from a single pumped system. A macerator handles the toilet; separate pump units would be needed for each additional fixture.
Higher use intensity: For a basement that will be used intensively — as a guest suite, a lettable annexe, or a space used frequently throughout the day — a lifting station’s pump is more robust and better suited to sustained demand.
Where a macerator has been problematic: Lifting stations, particularly those with grinder pumps, are significantly less sensitive to accidental flushing of inappropriate materials.
Installation
A lifting station requires a chamber to be installed below floor level — typically either set into the existing concrete slab (which means breaking out a section of concrete, excavating a pit, and reinstating the slab around the installed chamber) or in an accessible external location connected by underground pipework. The chamber must be accessible for inspection and pump maintenance.
This is more disruptive and expensive than a macerator installation, but the result is a conventional gravity drainage system within the basement, with pumped discharge above — a more seamless and permanent solution.
Building Regulations and Standards
Lifting station installations in basements should conform to BS EN 12050-1 (for domestic sewage lifting plants for use in buildings and sites). Approved Document H of the Building Regulations sets out the requirements for pumped drainage systems, including that the effluent receiving chamber should be sized for a 24-hour inflow allowance. As with macerators, Building Regulations approval is required.
Sewage Lifting Station Costs
- Lifting station unit supply: £500–£2,500 depending on capacity and specification
- Installation (breaking out slab, excavation, pipework, reinstatement): £1,500–£4,000
- Electrical connection: £300–£600
- Total installed cost: approximately £2,500–£7,000, depending on whether excavation is required and the number of fixtures connected
Option 3: Breaking Out the Slab for a Gravity Drain
The third option — breaking out the existing basement floor slab to install conventional below-slab drainage — is the most disruptive and typically the most expensive upfront, but it results in a completely conventional plumbing installation with no pumps, no electrical dependency, and no macerator maintenance to consider.
How It Works
A drainage channel is cut through the existing concrete slab at the required fall gradient, connecting to the underground drain at a lower level than the basement floor. A soil pipe and trap are installed in the conventional way, the concrete is reinstated around the new pipework, and the toilet and other fixtures drain by gravity exactly as they would in any other room.
This is the preferred approach for high-specification basement conversion projects where a permanent, maintenance-light drainage solution is a priority, and where the disruption of breaking out the floor can be absorbed into a broader programme of works — for example, during a full basement fit-out where the floor finish hasn’t yet been laid.
When It Makes Sense
Breaking out the slab for gravity drainage is most practical when:
- The basement is being converted from scratch and the floor hasn’t been finished
- The underground drain is at a level that makes gravity drainage achievable from the basement floor
- Multiple fixtures need permanent drainage without a pump system
- The project specification calls for a conventional, maintenance-light installation
It is substantially less practical when the basement is already finished, since breaking out the slab means removing the floor finish, cutting through structural concrete, making good, and reinstating — all of which is expensive and disruptive in a finished space.
Costs
- Breaking out and reinstating concrete slab: £500–£2,000 depending on area and thickness
- Drainage pipework installation: £1,000–£3,000
- Total drainage element: £1,500–£5,000 before the toilet, fixtures, and room finishes
Building Regulations: What You Need to Know
Regardless of which drainage method you choose, installing a toilet in a basement engages several parts of the Building Regulations:
Approved Document H (Drainage and Waste Disposal): Covers the drainage system — pipe gradients, connections, pumped systems. Any pumped drainage installation must comply with the relevant standards and be notified to Building Control.
Approved Document G (Sanitation, Hot Water Safety, and Water Efficiency): Covers the sanitary appliances themselves. The macerator permission clause (G 4.24) sits here, as does the requirement that every dwelling has at least one WC draining to a gravity system.
Approved Document F (Ventilation): A toilet must be ventilated. In a basement with no external wall, this typically means mechanical extract ventilation to the outside — a ducted fan running to an external wall or up through the building to a roof-level termination. The minimum extract rate for a separate WC is 6 litres per second continuous or 15 litres per second intermittent. Passive or natural ventilation is only acceptable where an openable window to the outside exists.
Approved Document P (Electrical Safety): The electrical installation for a macerator unit, and any electrical fittings within the bathroom zones, must be carried out by a Part P registered electrician and notified to Building Control.
A completion certificate from Building Control for the works is essential. Without it, the installation is unverified and may cause complications when selling the property.
Ventilation: The Part Most People Forget
A basement toilet without adequate ventilation is a problem — odours, humidity, and condensation accumulate in a space with no natural air movement. Unlike a bathroom on an upper floor that may have a window to the outside, most basement toilets have no openable window. Mechanical extract ventilation is the solution, and it’s a Building Regulations requirement.
The extract fan must discharge to the outside — not into a loft space, not into the basement void, but externally. This means a duct run through the basement wall to an external grille, or a longer duct run up through the building to a roof terminal. The duct must be as short and as straight as possible (bends reduce flow rate), insulated where it passes through cold voids to prevent condensation within the duct, and fitted with a non-return flap to prevent backdraught.
Specify a fan rated for the duct length and any bends in the run — most standard bathroom fans are rated for short, straight duct runs and underperform significantly with longer or more complex routes.
Water Supply
A toilet needs a cold water supply to the cistern. In most basements, a cold water supply pipe can be run from the ground floor supply with relatively minor pipework. The supply pipe should be insulated in any unheated sections to prevent frost damage.
If you’re adding a full bathroom suite — basin, shower, and toilet — the hot water supply is an additional consideration. A small point-of-use electric water heater dedicated to the basin is often the most practical solution in a basement, avoiding the heat loss from a long run of hot water pipework from the main cylinder.
The Practical Installation Steps: Macerator WC
For the most common installation — a macerator toilet added to a finished or near-finished basement — the practical sequence is:
1. Confirm drainage route: Establish where the small-bore discharge pipe will run from the macerator unit to the soil stack or drain. Measure the vertical rise required and the horizontal run. Confirm these are within the pump’s specification (typically 4–5m vertical rise, up to 100m horizontal run with adequate pipe sizing).
2. Arrange Building Regulations approval: Notify your Local Authority Building Control or appoint an Approved Inspector before work begins. Submit the drainage details and a brief description of the works.
3. Establish water supply: A qualified plumber runs a 15mm cold water supply to the cistern location. Any stop valve in an accessible position.
4. Install the discharge pipework: The 22–32mm small-bore pipe from the macerator unit’s intended position to the soil stack. The pipe should have a consistent fall of 1:200 (0.5cm per metre) — shallower than a gravity soil pipe, but necessary to prevent backflow. The connection to the soil stack requires a proprietary connector designed for the purpose.
5. Install the macerator unit and toilet: The macerator unit is positioned and connected to the toilet pan via a close-coupled or flexible connector. The discharge pipe connects to the unit’s outlet. The electrical supply (13-amp switched spur, positioned outside the bathroom zones as defined by BS 7671) connects to the unit.
6. Install ventilation: The extract fan and duct are installed and the fan tested for airflow before the room is finished.
7. Notified inspection: The Building Control inspector visits to check the installation before any work is concealed.
8. Completion certificate: Issued by Building Control on satisfactory inspection.
Choosing the Right Macerator: Key Considerations
Not all macerators are equally suited to all basement situations. Key factors:
Pump head capacity: The vertical height the pump can push waste upward. Standard domestic macerators handle 4–5m; heavy-duty units handle more. Measure the rise required in your installation and choose a unit with adequate capacity.
Multi-fixture capability: If you’re connecting a basin and shower to the same unit as the toilet, choose a macerator specified for multiple fixture connections. Some units accept connections from one additional appliance; others accept three or four. Check the specification carefully.
Brand reputation: Saniflo (SFA) is the established market leader in the UK and has been manufacturing macerator units here for decades. Their units are widely stocked, their replacement parts are readily available, and their service network is established. WC-Pump and Grundfos also produce quality units. Be cautious of very cheap units from unknown brands — the cost difference rarely compensates for the maintenance consequences of a premature failure.
Noise level: If the basement toilet is adjacent to a bedroom or living room, check the manufacturer’s noise specification. Better units produce around 45–50 dB during operation; basic units can be significantly louder.
A Note on Basement Conversions More Broadly
A toilet is usually one element of a broader basement improvement — a habitable room conversion, a guest suite, a home gym, or a leisure space. If you’re planning a hot tub or wellness area in the basement, a dedicated WC nearby is almost a necessity, and our guide to basement hot tub installation covers the other services and structural requirements involved.
The drainage approach you choose for the toilet should be considered in the context of the whole basement — if you’re also adding a shower, a sink, and connections to a hot tub drain, a lifting station that handles all of these in a single pumped system is almost always more sensible than a collection of individual macerator units and separate pump systems.
Think about the drainage as a whole, design it as a whole, and install it as a whole. The plumber who does the job should be able to advise on the most appropriate system for the full scope of what’s planned.
Summary: Which Drainage Option Is Right for You?
Macerator toilet — best for: adding a single WC (or WC with one or two additional fixtures) to a finished or near-finished basement; situations where disruption to the floor must be minimised; projects with moderate budgets. Cost: £1,200–£3,000 for a WC installation.
Sewage lifting station — best for: multiple basement fixtures draining to a single pumped system; high-use situations; where a macerator’s limitations are a concern. Cost: £2,500–£7,000.
Gravity drain via slab break-out — best for: basement conversions in progress where the floor hasn’t been finished; high-specification installations requiring no pump dependency; situations where the underground drain level makes gravity drainage achievable. Cost: £1,500–£5,000 for the drainage element alone.
In all cases: notify Building Control before starting work, use qualified tradespeople for plumbing and electrical installation, and get the completion certificate at the end. A basement toilet is a real asset — but only when it’s installed properly.