If there’s one word that strikes fear into the heart of an old-house owner — or anyone who’s just had a survey back — it’s damp. And if there’s one type of damp that gets more airtime, more misdiagnosis, and more unnecessary spending attached to it than any other, it’s rising damp. Rising dampness treatment is a multi-million-pound industry in the UK, which is in itself a clue that something about how we’re diagnosing and responding to this problem might not be entirely right.
That’s not to say rising damp doesn’t exist. It does. But genuine rising damp — groundwater drawn upward through porous masonry by capillary action — is far less common than the diagnosis would suggest. The Building Research Establishment (BRE) has been flagging misdiagnosis in this area since the early 1980s. Their Digest 245, first published in 1981 and revised in 2007, notes that investigations had “revealed many instances in which systems intended to combat rising damp have been installed in buildings where rising damp is not occurring.” That’s not a fringe view. That’s the government-linked research body that wrote the technical bible on the subject.
Understanding what you’re actually dealing with before spending money on treatment is the most important thing this article can tell you. So let’s start there.
What Rising Damp Actually Is
The Science, Briefly
Rising damp occurs when groundwater moves upward through the porous fabric of a wall via capillary action — the same mechanism that draws water up through a paper towel. In a wall without a functioning damp-proof course (DPC), or where the DPC has been bridged or compromised, moisture can wick upward through brick, stone, or mortar.
According to the Building Research Establishment, rising damp rarely exceeds heights of 1.5 metres above ground level, because the rate of evaporation from the wall surface eventually matches the rate of capillary rise. This ceiling effect is diagnostically significant: if you’re seeing damp higher than roughly 1.5 metres on a wall, something other than rising damp is almost certainly responsible.
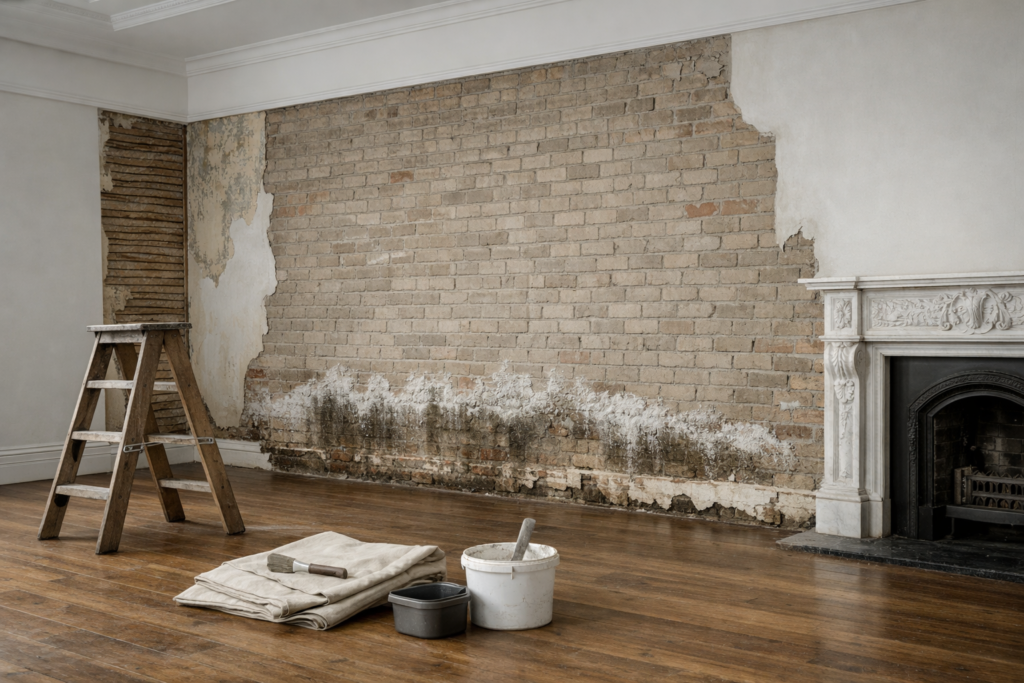
As moisture moves through the wall it carries soluble salts — nitrates and chlorides drawn from the ground. When the moisture evaporates at the wall surface, these salts are left behind. The characteristic white crystalline deposits (efflorescence) and the tide mark — a horizontal staining line across the lower portion of the wall — are among the most reliable visual indicators that genuine rising damp has occurred or is occurring.
The Damp-Proof Course: A Brief History
DPCs became compulsory in London in 1875. A layer of slate was also employed as a DPC in late Victorian properties. Before that, most houses were built without any physical barrier against ground moisture. Georgian and early Victorian properties — the solid brick and stone construction that characterises most of Britain’s pre-1875 housing stock — relied on the breathability of their walls and on the evaporation of moisture from the surface to manage ground moisture rather than prevent it.
This distinction matters enormously when you’re diagnosing damp. A Victorian terrace built in 1860 was never designed to be moisture-impermeable at ground level. It was designed to absorb and release moisture. When you introduce modern materials — cement render, gypsum plaster, impermeable paint — you interrupt that process, and moisture becomes trapped in the wall rather than evaporating from it. The result looks like damp, often reads as damp on a moisture meter, and gets diagnosed as rising damp. But the cause isn’t groundwater rising through the masonry. The cause is that someone sealed a breathing wall.
The Misdiagnosis Problem: Why It Happens So Often
This is the section that could save you thousands of pounds.
Rising damp is widely misdiagnosed on the basis of high electrical moisture meter readings alone. Elevated readings occur not infrequently in old buildings that are virtually dry, due to salt deposition from evaporation, or can indicate another problem altogether, such as penetration from rainsplash.
Electrical resistance moisture meters — the handheld devices with two pins that are pressed into a wall surface — measure conductivity, not water. Salts conduct electricity. A wall that dried out years ago but retains hygroscopic salt contamination will give high moisture meter readings without any active moisture movement. A surveyor who sees high readings, notes damp evidence, and concludes “rising damp” without further investigation has not diagnosed the problem — they’ve confirmed their assumption with the wrong tool.
Superficial inspections can lead to incorrect conclusions. Installing inappropriate systems, such as unnecessary rising damp treatment, may fail to resolve underlying issues. A thorough approach considers building age, construction type, external conditions and internal usage patterns.
The damp-proofing industry also has a structural conflict of interest worth acknowledging. Companies that both diagnose and treat damp have a commercial incentive to find damp. Independent surveyors who don’t sell treatments have no such incentive. This is not an accusation of widespread dishonesty — most surveyors and damp contractors are acting in good faith — but it is an argument for getting an independent assessment before commissioning treatment.
The Three Types of Damp: Telling Them Apart
Before any treatment decision, you need to be confident about what you’re dealing with. The three main types of damp in old buildings look similar on the surface but have completely different causes, locations, and remedies.
Rising Damp
Where it appears: Ground floor only. Because rising damp is caused by moisture from the ground, it will only ever be noticeable at ground floor levels. If there are signs of damp higher up in your property, it is often penetrating damp or a condensation problem.
What it looks like: A tide mark — a horizontal band of staining at low level, typically between 300mm and 1m above floor level. White crystalline salt deposits on or just below the surface. Damaged plaster and peeling paint at low level. Skirting boards may be damp or rotting.
What distinguishes it: The tide mark and salt deposits are the key indicators. If rising damp exists, there will be visible indications such as an accompanying tide-mark, but not, for example, the external green staining symptomatic of rain penetration. High nitrate concentrations are likely.
Likely causes: A missing DPC (common in pre-1875 properties), a bridged DPC (where external ground levels have risen above the damp-proof course, or where render, paving, or soil bridges the barrier), or a failed DPC in later properties.
Penetrating Damp
Where it appears: Any level — often at mid-wall or higher, near windows, around chimney breasts, or at the junction of a roof and a wall.
What it looks like: Damp patches that appear or worsen after rain. Green algae or staining on external walls. Blown render or localised plaster failure. Damp around window frames or at the base of external walls where gutters overflow.
What distinguishes it: The location (not confined to low level) and the correlation with rainfall. External green staining, cracked render, and visible pointing failure are typically present.
Likely causes: Failed pointing, cracked render, defective flashings, blocked gutters overflowing onto the wall, cracked or missing mortar around window frames. In every case, there is an entry point that can be identified and fixed.
Condensation
Where it appears: On cold surfaces — external walls, windows, wall corners at low level and high level. Often worst in kitchens, bathrooms, and poorly ventilated rooms.
What it looks like: Surface mould (typically black mould — Cladosporium or Aspergillus) on walls and ceilings. Moisture on windows. Damp patches on external walls, particularly in winter or in the morning.
What distinguishes it: Mould growth rather than salt deposits. Appearance on upper floors as well as lower (condensation is not confined to ground level). Worse in winter and after cooking, bathing, or drying clothes indoors.
Likely causes: Inadequate ventilation, insufficient heating, cold bridges in the wall structure, or — particularly in old houses — modern draught-proofing that has reduced natural ventilation without replacing it with mechanical extraction.
Getting the Diagnosis Right
The Surveyor Question
Do not commission a rising damp treatment from the same company that surveyed the property and found the problem. Get an independent diagnosis first.
An independent chartered building surveyor — particularly one with experience in traditional construction — should be your starting point. They have no commercial interest in finding rising damp. They will assess the whole building context: construction type, ground levels, external condition, ventilation, heating patterns, and the history of any previous interventions.
Accurate identification requires thorough testing, such as gravimetric testing, moisture testing, and salt testing. These tests can be time-consuming but ensure the appropriate remedial treatment is implemented for the correct type of damp.
Gravimetric testing — drilling samples from the wall and weighing them before and after drying — is considerably more reliable than surface moisture meters. Salt analysis can confirm whether ground-sourced nitrates are present (indicating genuine rising damp) or whether the salts are of a different composition suggesting another cause.
The Property Care Association (PCA) is the trade body for damp and timber specialists in the UK. PCA-qualified surveyors hold the Certificated Surveyor in Remedial Treatments (CSRT) qualification. While PCA-qualified specialists may still be working for treatment companies, the qualification at least provides a benchmark for technical competence.
Rising Dampness Treatment Options
Assuming you’ve established, through proper independent investigation, that you genuinely have rising damp, these are the treatments available. They range from non-invasive and highly appropriate to invasive and of limited value in traditional construction.
1. Remove the Bridge First
Before any other treatment is considered, the first question is whether the DPC is being bridged. Where the cause of rising damp is due to the bridging over the damp-proof course — raised ground levels, bridging plaster render, or debris in the cavity — then removing the bridge should hopefully be sufficient to control the capillary rise of moisture in the wall.
This means:
Reducing external ground levels. If soil, paving, or garden beds have built up above the DPC line (typically visible as a band of engineering brick or slate 150mm above external ground level, or identifiable from the building drawings), lowering the external ground level away from the wall reinstates the DPC’s function at no further cost.
Approved Document C of the Building Regulations sets out that an external wall DPC should be at least 150mm above adjacent ground level in typical arrangements. If ground levels have risen above this threshold, this is likely the cause — and the fix is free.
Cutting back bridging render. Where external render bridges down below the DPC line, cutting a horizontal channel through the render at DPC level to break the bridge is often sufficient.
Clearing cavity debris. In late Victorian and Edwardian properties with cavity walls, debris falling into the cavity over the decades can accumulate above the DPC level, bridging the barrier. Cavity inspection and clearance addresses this.
2. Physical Damp-Proof Course Insertion
A physical DPC — a layer of impermeable material inserted into the masonry at DPC level — is the most durable long-term solution for walls with no DPC or where the original has completely failed. It involves cutting a slot in the mortar course at the appropriate level, inserting a DPC membrane (typically polyethylene), and repointing.
This is disruptive and not always practicable — in rubble stone walls or irregular construction it can be structurally inadvisable. In solid brick construction it’s more feasible. The work should be done by experienced contractors and the masonry made good in appropriate lime mortar.
3. Chemical Injection DPC
Chemical injection — drilling a series of holes along the base of the wall and injecting water-repellent silane or siliconate compounds — is the most widely offered rising damp treatment in the UK. It’s less disruptive than physical DPC insertion and can be completed in a day.
The honest assessment of its effectiveness is mixed. In new cavity-wall construction, chemical injection DPCs are well-supported by evidence. In old solid-wall buildings with traditional construction, the picture is less clear. The compounds need to diffuse through the masonry to form a continuous barrier, and in rubble stone walls, random bond brickwork, or walls of irregular or variable porosity, achieving a continuous treated zone is genuinely difficult.
The BRE highlighted that systems intended to combat rising damp had been installed in buildings where rising damp was not occurring, and that a frequent reason for this had been a wrong interpretation of high readings obtained when using an electrical moisture meter.
Chemical injection, where it is genuinely warranted and professionally installed, can be effective. It should be specified in accordance with BS 6576 (the British Standard for installing chemical DPCs in masonry) and installed by PCA-member contractors. Be cautious of low-cost DIY chemical injection kits: the chemical must penetrate to the full wall thickness, and a partial treatment is of limited value.
4. Electro-Osmotic Systems
Electro-osmotic damp-proof systems — which attempt to use a low electrical current to reverse the polarity of water molecules and drive moisture downward — have been marketed for decades. The evidence for their effectiveness is not strong. They’re not recommended by the BRE as a primary treatment for rising damp and should be approached with considerable scepticism.
Replastering After Treatment: Getting the Materials Right
Whatever treatment method is used, the internal plasterwork affected by rising damp will need to be replaced. This is where a significant number of well-intentioned treatments fail in old buildings.
The sequence matters:
- Treat the source of the damp (or confirm that the bridge has been removed and the DPC is now functioning)
- Allow the wall to dry out — this takes longer than people expect, typically many months in thick solid-wall construction
- Replaster in breathable lime plaster, not gypsum
This last point is critical in old buildings. Solid walls in early Victorian properties can cause condensation issues as they are large cold surfaces. If the original render fails, they can also allow weather like driving rain to penetrate. Replastering in standard gypsum over a wall that still contains residual moisture and salts — even if the source has been treated — will result in the salts migrating through the plaster and causing it to fail within months.
The appropriate approach:
- Hack off all contaminated plasterwork to a level above the visible tide mark (typically 1m, or wherever salt contamination testing shows it to be present)
- Allow the wall to dry — this genuinely takes time. Opening up the wall to air, maintaining background heat, and using dehumidifiers can accelerate drying but the process cannot be rushed. A thick Victorian solid brick wall can take six to twelve months to fully dry after the source of moisture has been addressed
- Replaster in renovating lime plaster — a moderately hydraulic lime plaster with a low absorption rate that allows moisture and salts to continue migrating without damaging the plaster face. Proprietary renovation plasters (such as those from Limelite or similar systems) are designed specifically for this scenario
Do not use sand-and-cement render or standard gypsum plaster directly against an old wall that has had rising damp. The results are reliably poor.
The Ventilation Angle
One aspect of rising damp treatment that often gets overlooked is sub-floor ventilation. In Victorian and Edwardian terraces with suspended timber ground floors, the timber joists sit in pockets in the external wall at low level, within the zone typically affected by rising damp. If those joists are sitting in damp masonry, they will rot — regardless of what happens to the wall above.
The ventilated void beneath the suspended floor is supposed to keep this zone dry through through-ventilation via airbricks. When airbricks become blocked — painted over, built into external render, or obstructed by raised garden beds — the void becomes damp and the joists are at risk.
Before any rising damp treatment in a Victorian terrace, check all airbricks are clear, open, and unobstructed. It’s a free intervention that can make a dramatic difference to moisture levels at low level.
What Good Treatment Actually Looks Like: A Summary
If you take one framework away from this article, let it be this:
Diagnose before treating. Get an independent survey — not from a company that sells treatments. Use proper moisture testing methods, not surface meters alone. Establish whether you’re dealing with rising damp, penetrating damp, condensation, or residual salt contamination from previous damp.
Fix the cause, not the symptom. If the DPC is being bridged, remove the bridge. If gutters are overflowing onto the wall, fix the gutters. If condensation is the problem, address ventilation and heating. Treatment without addressing the cause is expensive decorating.
Use appropriate materials. In old solid-wall buildings, lime plaster is the correct internal finish after rising damp remediation. Gypsum over a contaminated wall will fail.
Allow time. Walls dry slowly. Rushing back to decoration before a wall is fully dry undoes the treatment.
Keep records. Any remedial work done — surveys, treatments, replastering — should be documented. This matters at the point of sale and protects you if a treatment fails and the guarantee needs to be invoked.
Rising dampness treatment, done correctly on the basis of an accurate diagnosis, genuinely works. The problem is that it’s too often sold on the basis of an inaccurate diagnosis, using materials that aren’t appropriate for the building type, and without addressing the underlying cause. Getting those things right isn’t complicated. It just requires a bit more patience and a bit more scepticism than the industry sometimes encourages.
The BRE’s guidance — along with Historic England’s technical advice notes for traditional buildings at historicengland.org.uk/advice/technical-advice — is freely available and worth reading before commissioning any damp survey or treatment. Knowledge is considerably cheaper than a wrongly specified chemical injection.