

You verify the structure, you confirm zoning, you map utilities. You start by checking slab condition, roof loads, and egress paths, then match the space to residential code and permit routes before you touch finishes. You lay out sleep, work, and lounge zones along existing bays to keep daylight and service runs efficient. Air-seal at penetrations, add continuous insulation, and manage vapor where the climate demands it. Next comes the part that can make or break the conversion…
Assess the Workshop for Code and Feasibility

Before you sketch layouts or pick finishes, evaluate the workshop like a change-of-occupancy project: confirm zoning and permitted use, then verify the structure can meet residential code for life safety and energy performance.
Expect zoning challenges such as parking minimums, setbacks, noise ordinances, and limits on accessory dwelling units.
Pull permit history, survey property lines, and document existing egress, fire separation, and ceiling heights.
Order structural assessments of slab thickness, vapor barrier, framing spans, roof loads, and any corrosion from chemicals or welding.
Test for asbestos, lead, and soil contamination, and map utilities capacity for electrical amperage, gas, and sewer.
Trend-wise, jurisdictions now scrutinize airtightness, insulation values, and ventilation rates, so budget for blower-door, duct leakage, and upgraded windows.
Plan the Workshop-to-Home Layout and Zones
You’ll map the shell into clear living zones—sleep, cook, work, and bathe—using existing spans, slab conditions, and utility runs to minimize rework.
You’ll tune daylight with window placement, glazing specs, and interior sightlines so task areas get consistent lux levels while private zones stay controlled.
You’ll lock in efficient circulation by keeping paths straight, sizing clearances to code, and positioning storage and partitions to avoid pinch points and dead space.
Define Functional Living Zones
Because workshops are typically built around open floor plates and hard-edged utilities, you’ll get the best conversion results by carving the space into clear living zones that align with existing structural bays, plumbing runs, and electrical service. Map “wet” functions (kitchen, bath, laundry) to the shortest pipe runs, and cluster high-load appliances near the panel for cleaner homeruns and fewer junctions.
Use Zone partitioning that stays reversible: glazed steel frames, acoustic curtains, or storage walls that stop short of sprinklers and duct trunks. Then lock in Furniture arrangement to reinforce boundaries—sofas define the lounge edge, a banquette anchors dining, and a worktable aligns to bay spacing.
Reserve a flex zone for studio or guest use, sized to standard rug and module dimensions to simplify procurement and future reconfiguration.
Optimize Light And Circulation
While you’re zoning the floor plate, tune the plan to daylight paths and clear circulation so the space reads like a home, not a bay-and-bench shell. Place primary living zones along the best glazing, then keep tall storage and enclosed rooms to the darker perimeter.
Use borrowed-light strategies—clerestories, interior glass, and light wells—to push natural light deep into the plan.
Establish a 36–42 inch main circulation spine from entry to kitchen to studio, and avoid dead ends by creating loops around core volumes.
For airflow management, align operable windows and high/low vents for cross- and stack-ventilation, and size ceiling fans to the bay.
Treat former overhead doors with insulated glazing panels or sliders, preserving openness without drafts.
Air-Seal, Insulate, and Control Moisture
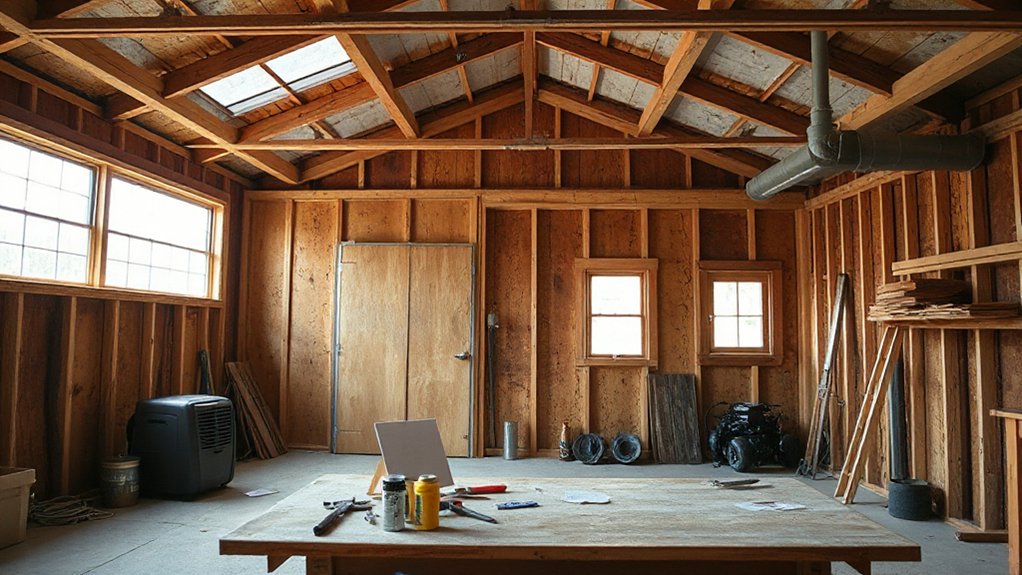
Before you hang drywall or pick finishes, lock down the building envelope: air-seal every gap at the sill plate, rim joists, penetrations, and door/window frames (tape, gasket, or spray foam as appropriate). Then insulate to a continuous R-value and add a defined moisture strategy.
Use blower-door mindset: chase leakage paths, then verify with smoke pencil or IR scan.
Choose insulation by assembly: closed-cell at thin or damp zones, dense-pack cellulose for sound and retrofit cavities, mineral wool for fire resilience.
Don’t trap moisture—pair interior vapor retarder paint or smart membrane with a drained, ventilated rainscreen where needed.
Plan ventilation strategies that balance indoor humidity without over-drying.
Your material selection should favor low-perm where required, but allow drying to at least one side.
Add HVAC, Plumbing, and Electrical (Permit-Ready)
Once your envelope performs like a controlled system, you can lay out HVAC, plumbing, and electrical with a permit-ready scope that won’t get redlined in plan review.
Size the HVAC system with a room-by-room Manual J, then document Manual S/D and dedicated ventilation (ERV/HRV) tied to MERV filtration and quiet static targets.
Route ducts and lines through conditioned chases to avoid condensation and thermal losses.
For plumbing, map wet-wall stacks, cleanouts, shutoffs, and hammer arrestors; specify Plumbing fixtures with flow rates that meet local code and utility incentives.
For electrical, draft load calcs, panel schedule, AFCI/GFCI zones, and dedicated circuits for tools and appliances.
Coordinate penetrations, firestopping, and seismic strapping, then submit sealed drawings.
Include as-builts and test reports.
Design Layered Lighting for Living and Making
How do you light a space that shifts between precision work and downtime without fighting glare or shadows? Start with a high-CRI (90+), dimmable ambient glow: 3000–3500K for a warm-neutral base that keeps finishes honest. Use wide-beam ceiling fixtures or linear LEDs with diffusers to soften contrast and avoid hotspotting on polished concrete.
Then build task layering. Put adjustable track heads or articulating arm lamps over benches, set to 4000K for sharp edge definition, and aim them 30–45° off-axis to cut specular glare. Add under-shelf or rail-mounted strips with frosted lenses for shadow-free close work.
Control it all with zones: separate switches plus scene presets (Work/Clean/Relax), and include occupancy sensors where code allows.
Build Storage That Hides Tools, Supports Life
Although the workshop vibe can look great, you’ll live better when your storage makes tools disappear on demand and keeps daily essentials within reach.
Start with a wall-to-wall base cabinet run: 24-inch-deep boxes, full-extension soft-close slides, and labeled drawer dividers for fast resets.
Add a flip-up worktop that locks at 90° for making, then drops to reveal Creative storage beneath.
For power tools, build a tall pantry with vented doors, adjustable euro-hinges, and a charging shelf wired to a dedicated circuit.
Use toe-kick drawers for clamps and consumables.
Mount a slatwall inside a pocket door for hidden organization, so your “shop” vanishes during dinner.
Finish with acoustic felt liners to cut rattle and protect blades and bits.
Conclusion
You’re turning rough utility into refined comfort: steel bays become quiet bedrooms, shop drains feed sleek kitchens, and task circuits power both laptops and lathes. You’ll verify code, lock in permits, and keep the plan modular so zones flex with your projects. Then you’ll air-seal, insulate, and manage vapor so the space feels calm, not clammy. Add efficient HVAC, layered LED lighting, and concealed storage—messy making, tidy living, all in one.