

You can turn a hayloft into a light‑filled workspace, but you’ll start by verifying structure, moisture history, and load paths before you cut in skylights or dormers. You’ll map your plan around beams, headroom, and code‑required egress, then design stairs and railings that move people and furniture safely. You’ll air‑seal and insulate without burying rafters, run clean power and fast internet, and keep the patina—if you solve one tricky constraint first…
Check if Your Hayloft Can Be a Workspace
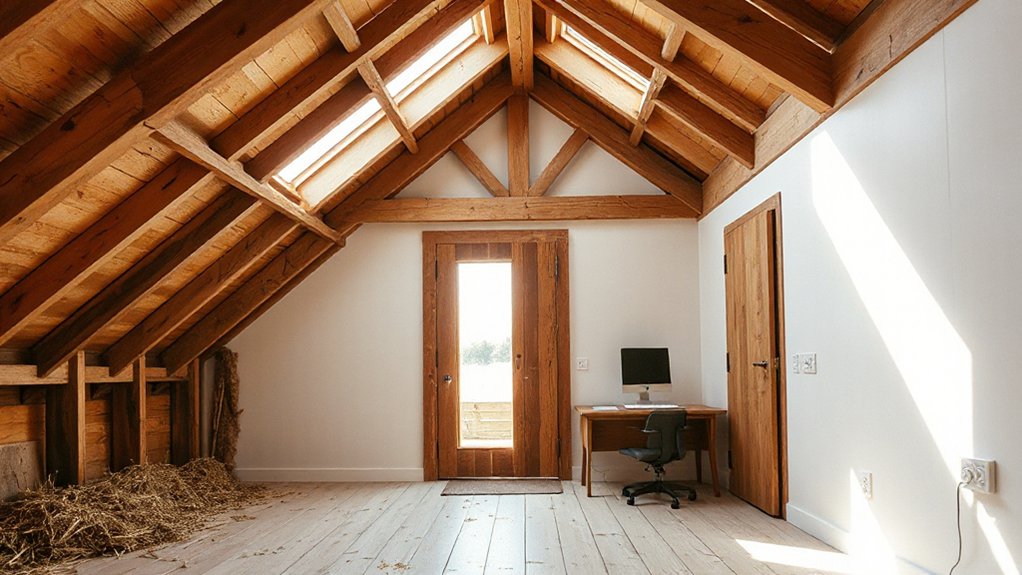
Before you sketch built-ins or hunt for skylights, you’ll need to confirm your hayloft can safely and legally function as a workspace. Start with a practical survey: measure headroom, map usable floor area, and note roof pitch, tie beams, and collar ties that limit layout.
Check for sagging joists, rot at bearing points, insect damage, and prior notch cuts; a structural engineer can verify live-load capacity for desks, shelving, and concentrated equipment.
Evaluate moisture pathways, insulation voids, and air sealing around the roof deck to prevent condensation over warm, occupied hours.
If your barn falls under Historical preservation expectations, document original timbers and hardware so upgrades stay reversible.
You can still plan aesthetic enhancements, like exposed joinery and limewashed planks, without compromising performance.
Confirm Permits, Fire Safety, and Egress Rules
Once you’ve confirmed the hayloft’s structure and moisture control can support daily use, run the project through your local building department so your workspace isn’t undermined by code issues later. You’ll likely need a change-of-use permit, electrical and mechanical approvals, and stamped drawings if you’re altering framing or openings.
Confirm fire-safety requirements: smoke and CO alarms, interconnected detection, any needed fire-rated gypsum, and protected penetrations around wiring and ductwork. For egress, verify minimum ceiling heights at required paths, emergency escape window sizing, and door hardware that opens without special knowledge.
Plan circuits and load calculations so decorative lighting doesn’t overload old runs, especially near insulation. Keep vintage furnishings clear of heat sources and ensure finishes meet flame-spread limits.
Plan Access: Stairs, Railings, and Moving Furniture
You’ll want a stair strategy that preserves floor area—think alternating-tread, ship-ladder, or compact switchback runs—while still hitting tread, rise, and headroom targets for comfortable daily use.
You’ll also need code-aligned railings with tight baluster spacing, a graspable handrail profile, and solid anchorage into existing timbers so the airy look doesn’t compromise fall protection.
To move desks and material upstairs without scuffing new finishes, you can spec a discreet ceiling-mounted hoist or loft-rated track system that’s sized for real loads and easy, controlled handling.
Space-Saving Stair Design
Although the hayloft’s generous volume invites big gestures, the stair has to work like a compact piece of equipment—tight footprint, code‑smart rise and run, and a clear path for moving desks, panels, and tools.
You’ll favor an L‑turn or alternating‑tread profile when headroom pinches, keeping landings sized to pivot long items without scuffing walls.
Specify innovative stair materials like folded steel plate, slim LVL stringers, or perforated treads that pass light and dust down, reducing visual mass.
Pair them with space-efficient railing designs: wall‑mounted handrails, cable infill, or thin steel flats that stay graspable while freeing elbow room.
You’ll align the stair with storage bays below and keep the first tread pulled back to protect circulation through the shop floor.
Safe Railings And Hoists
How do you keep an airy hayloft mezzanine feeling open while still meeting real fall‑protection and load‑handling demands? You specify railings that read light but perform heavy: slim steel posts, tensioned cable infill, and a continuous wood cap that nods to rustic charm.
You lock in safety standards with a 42-inch guard height, tight infill spacing, and solid blocking at every anchor point so lateral loads don’t rack the frame.
At stair landings, you add return rails and visual contrast strips to reduce missteps.
For moving furniture, you integrate a compact beam trolley or swing‑arm jib with a rated hoist, then verify joist capacity, fastener shear, and lift path clearance.
You’ll keep the loft serene, and safer.
Map the Layout Around Beams and Headroom
You’ll map beam‑aligned work zones by snapping desk runs, task lighting, and cable trays to the structural grid so everything reads intentional and clean.
You’ll set headroom‑first circulation paths under the tallest bays, keeping walk lines code‑clear while letting the lowest chords define lounge or seated focus areas.
You’ll convert low‑clearance edges into built‑ins—drawer benches, toe‑kick cabinets, and under‑slope shelving—so storage stays high‑capacity without stealing volume.
Beam‑Aligned Work Zones
Before you move a single desk, read the hayloft’s beams like a structural grid: align primary work zones to the tallest headroom corridors between timbers and tuck low‑clearance tasks—storage runs, built‑ins, lounge seating—under the deepest drops.
Set your main benching parallel to the beam line so task lights, cable trays, and acoustic baffles can mount cleanly without fighting structure.
Use beam bays as “rooms”: a focused making bay, a quiet laptop bay, and a collaborative pin‑up bay, each scaled to the span.
Keep sightlines open by choosing low partitions and transparent shelving, letting Rustic charm and Vintage decor sit lightly against the timber.
Specify slim, beam‑clipped power poles, and you’ll preserve floor area while meeting modern plug loads.
Headroom‑First Circulation Paths
Once your work bays lock onto the beam grid, let circulation follow the same logic: prioritize the tallest, cleanest headroom lanes for daily movement and treat low-beam pockets as destinations, not thoroughfares.
You’ll sketch a primary spine along the ridge line or highest joist run, then branch short connectors to benches, meeting nooks, and glazing.
Mark every beam drop and collar tie on plan and section, then set a minimum clear height for walkways so you don’t duck mid-stride.
Use floor cues—runner rugs, plank direction, or a slim track of downlights—to reinforce the safe path without adding partitions.
This headroom optimization boosts circulation efficiency, keeps sightlines open, and supports a modern, gallery-like flow.
Low‑Clearance Storage Solutions
While the beam grid steals standing height at the eaves, it hands you prime real estate for low-clearance storage—so map these zones in section and treat every under-beam pocket like a built-in. Snap chalk lines beneath each joist, then set a consistent “no-bump” datum, typically 72–78 inches, to keep circulation safe and sightlines clean.
Use Vertical shelving only where headroom spikes between beams, and keep uprights tight to posts so you don’t create shoulder hazards. Elsewhere, run toe-kick drawers, slide-out trays, or hinged lids that open parallel to the roof pitch.
Specify Compact bins with label rails and dust gaskets; haylofts shed grit. Add LED strip task lighting under beams, and finish fronts in pale plywood to bounce daylight.
Set a Scope, Timeline, and Realistic Budget
Even if you’re chasing that airy, Scandinavian‑leaning studio vibe, you’ll keep the project on track only if you lock the scope, timeline, and budget early. Define what “done” means: insulation and air‑sealing targets, window or skylight count, HVAC approach, electrical capacity, and data runs.
List finish priorities—whitewashed boards, matte microcement, Decorative lighting, and selective Vintage decor—then rank what can slide if costs spike.
Build a schedule around lead times: permits, engineering, specialty glazing, and millwork. Add contingency (10–20%) for hidden framing repairs, pest cleanup, or code‑driven upgrades.
Price labor by trade, not by guesswork, and reserve a line item for inspection rework. Track decisions in a single change‑order log so scope creep doesn’t eat daylight or dollars.
Reinforce the Loft Floor for Office Loads
Before you move desks, shelving, and rolling chairs upstairs, you’ll verify the loft’s live-load capacity against modern office expectations. You can’t guess—inspect joist spans, beam sizing, connections, and any signs of sag or checks.
Then, run the numbers or have an engineer confirm them. If the structure comes up short, you’ll sister joists, add LVL or steel flitch reinforcement, and tighten load paths to keep the floor stiff, quiet, and code-ready.
Assess Load Capacity
Because a hayloft was built for intermittent storage—not continuous, people‑heavy use—you’ll want to verify its load capacity before you drop in desks, shelving, and rolling chairs. Start by mapping the footprint of your workspace and listing point loads (file cabinets, bookcases, battery backups) versus live loads (people, movement).
Bring in a qualified pro to review spans, species, fasteners, and any prior notching, then confirm assumptions with targeted load testing where access allows. You’ll also want to check for bounce and vibration that can make a minimalist, tech‑forward office feel cheap, even when finishes look refined.
Plan weight distribution intentionally: cluster heavy storage over bearing lines, avoid stacking dense items near mid‑span, and keep rolling loads away from weak edges.
Strengthen Joists And Beams
Once you’ve confirmed the existing floor’s limits, you can stiffen the loft structure so it performs like a modern office deck instead of a farm storage platform.
Start with joist reinforcement: sister undersized members with LVL or kiln-dried dimensional lumber, then add construction adhesive and through-bolts to curb squeaks and deflection. Where spans run long, install midspan blocking or a continuous strongback to share loads, and upgrade the subfloor with a glued-and-screwed plywood layer for a flatter, quieter finish.
For beam strengthening, you can laminate flitch plates or LVL to existing timbers, or introduce a new steel channel beam concealed behind a clean ceiling plane. Pair upgrades with proper bearing posts and footings, so added strength doesn’t overstress the barn’s original supports.
Add Skylights or Dormers for Daylight
While the hayloft’s steep roofline already gives you volume to work with, skylights or small dormers let you convert that height into usable daylight that reaches the desk plane. For smart skylight installation, you’ll site units between rafters, align them with your task zones, and specify high-performance glazing plus integral shades to manage glare on screens.
You’ll also detail ice-and-water membranes, stepped flashing, and continuous air-sealing so the roof stays tight through freeze-thaw cycles.
With Dormer design, you can add vertical face area that bounces light deeper, create clean interior shafts, and preserve the barn’s silhouette with minimal projections. Keep openings proportionate to rafter spacing, and coordinate headers and cripple rafters so loads transfer cleanly.
Choose Windows for Views, Ventilation, and Efficiency
To turn a hayloft workspace into a place you’ll actually want to sit all day, choose windows that frame the best views, drive cross‑ventilation, and hit modern energy targets without fighting the barn’s proportions.
Start by mapping sightlines from your desk and placing larger glazing on the view side, then balance it with operable units opposite for natural ventilation.
Lean into Window styles that suit agrarian geometry: tall casements for full‑height air sweep, awning windows high on gable walls for rain‑safe purge, and fixed panes where you want uninterrupted scenery.
Specify low‑E, argon‑filled double or triple glazing, warm‑edge spacers, and fiberglass or thermally broken aluminum frames.
Add insect screens and simple interior shades so glare and heat gain stay controllable year‑round.
Insulate and Air-Seal Without Hiding Rafters
If you want the hayloft to feel crisp in winter and calm in summer without losing that exposed‑rafter character, build your thermal and air barrier above the structure, not below it. You’ll tape the roof sheathing seams, then add a continuous membrane or peel‑and‑stick underlayment to stop wind‑washing at the eaves and ridge.
Between rafters, choose high‑density mineral wool or wood‑fiber batts; they friction‑fit cleanly and help Hayloft acoustics by damping echo.
Over the rafters, add a rigid layer—polyiso, cork, or fiberboard—to break thermal bridges, then strap and reroof.
Keep a ventilated over‑roof if your climate demands it, and detail every penetration with gaskets so your air seal stays durable.
Plan Outlets, Lighting Circuits, and Internet
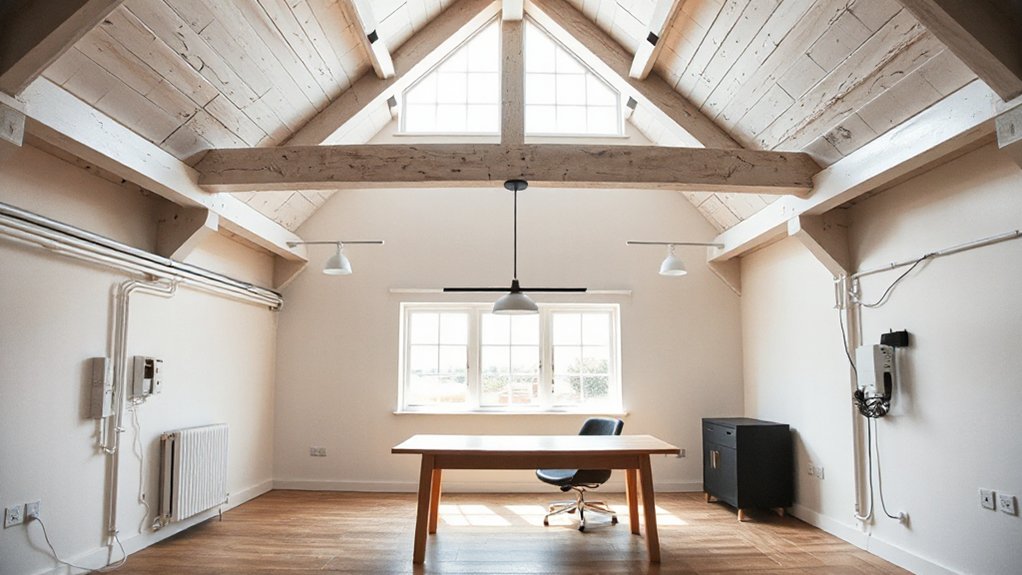
Because a hayloft office lives or dies by its flexibility, map power, lighting, and data before you close up any bays: lay out a receptacle plan that hits every desk wall with 20‑amp circuits (AFCI/GFCI where required), add floor or ceiling drops where furniture will float, and reserve a dedicated homerun for a mini‑split, radiant panel, or future gear.
For outlet placement, prioritize corners, printer zones, and a high receptacle for wall‑mounted monitors; keep cords off the floor with surface raceway painted to match boards.
Split lighting from receptacles in your circuit design, then dim LEDs on 0–10V drivers or smart switches rated for low‑load flicker control.
Run Cat6A in conduit, add a ceiling‑mounted Wi‑Fi AP, and leave pull strings for upgrades.
Choose Hayloft-Friendly Heating and Cooling
While the hayloft’s rafters and wide‑open volume look effortless, they amplify heat stratification, solar gain, and winter drafts, so you’ll want HVAC that targets the occupied zone instead of trying to condition the entire peak.
Pair upgraded hayloft insulation with air‑sealing at eaves, ridge, and hatch points to cut load before you size equipment.
For heating options, a ductless cold‑climate heat pump gives zoned control and high COP, and you can add a low‑profile ceiling fan to destratify without turning the loft into a wind tunnel.
If you need backup during deep freezes, spec a compact electric panel or sealed‑combustion unit, not an open flame.
For cooling, choose inverter systems, smart thermostats, and discreet line‑set routes that won’t fight your framing.
Build Hidden Storage and Finishes That Keep Patina
Once you’ve dialed in comfort with zoned heating and cooling, make the loft work harder with storage that disappears into the architecture and finishes that honor the hayloft’s age.
Build knee-wall cabinetry between rafters, flush with shiplap, and use touch-latch doors so hardware won’t visually clutter the volume.
Add Hidden compartments under a window bench, behind sliding barn-style panels, or inside a stair riser for cords, paper, and tools.
Specify birch ply boxes with edge banding for stability, then face them in reclaimed boards to match existing grain.
For Patina preservation, skip heavy sanding; vacuum, treat insect damage, and seal with breathable hardwax oil.
Use limewash on infill, and choose matte black steel trims that read contemporary without overpowering old timber.
Conclusion
When you climb the new stairs and hit that first sun stripe from a dormer, you’ll feel the barn exhale. One client logged daylight readings jumping from 80 lux to 1,200 after skylights—like flipping a dimmer on your focus. You’ve reinforced joists, air‑sealed tight, and run clean circuits and fiber, so the romance doesn’t fight performance. Keep the patina, hide the storage, and you’ll work inside history—only brighter, safer, and built to last.