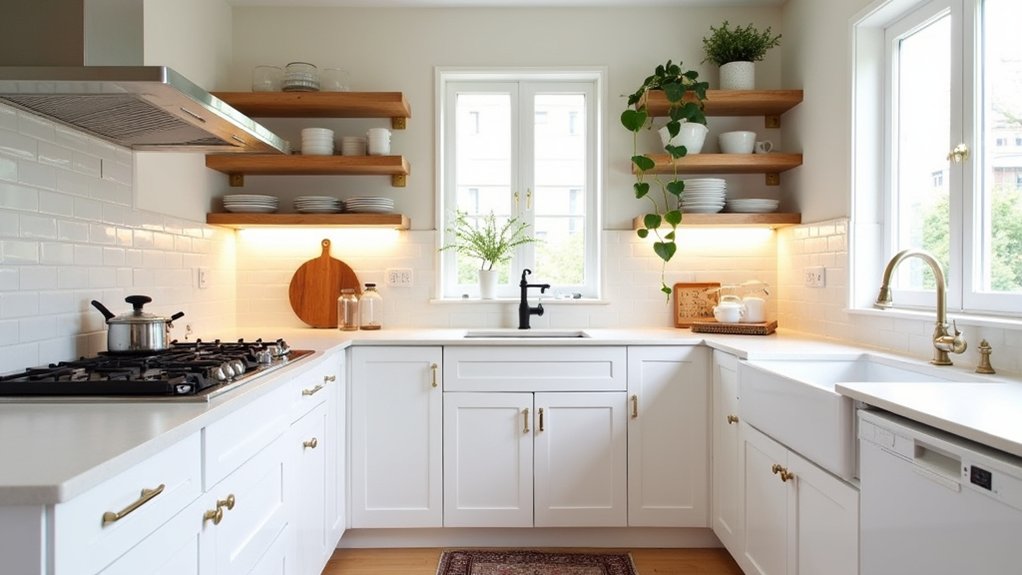

If your kitchen feels cramped, you don’t need a full remodel to make it work better and look sharper. You can start by setting clear priorities, then use layered lighting to brighten prep zones and soften the room at night. Keep your color palette tight, repeat one or two finishes, and push storage upward with shelves and hooks. Choose decor that earns its space, then add one bold “hero” detail… but where should it go?
Set Your Small-Kitchen Decor Priorities
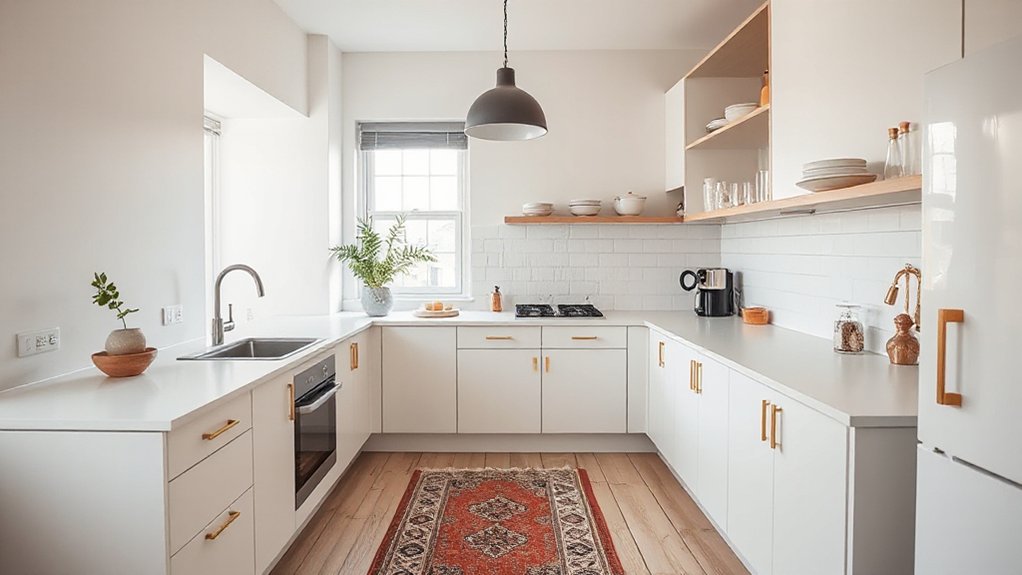
Before you buy a single basket or paint sample, decide what your small kitchen needs to do better—more prep space, smarter storage, brighter lighting, or a cleaner look. List your top two problems and solve those first so every purchase earns its footprint.
Measure counter runs, aisle width, and dead zones; then choose pieces that fit exactly, like a slim cart, wall rail, or over-sink board.
Lock in a Color palette early so you don’t collect mismatched textiles, containers, and hardware. Repeat two finishes (for example, black and brushed steel) to keep decor harmony while mixing materials.
Set “no-counter clutter” rules: store daily items on a tray or in a drawer organizer. Edit duplicates, then decorate the cleared space.
Brighten Fast With Layered Kitchen Lighting
Layer your lighting by pairing an even ambient fixture with focused task light over prep zones, so you don’t waste watts or counter space.
Add slim under-cabinet LED strips to brighten countertops without adding bulky lamps or clutter.
Install dimmers so you can shift from bright cooking light to softer evening light with one quick adjustment.
Combine Ambient And Task
Even if your kitchen is short on square footage, you can make it feel bigger and work better by combining ambient and task lighting. Start with ambient lighting that spreads evenly: a flush-mount ceiling fixture, a semi-flush drum, or recessed cans keep the ceiling visually clean and reduce shadows. Choose bulbs around 3000K so counters look natural and the room stays warm, not dingy.
Next, define task zones where you prep, cook, and wash. Aim a small pendant over the sink, add an adjustable spotlight near the stove, and use a directional ceiling can over your main counter.
Put ambient and task lights on separate switches or dimmers so you can brighten work areas without overlighting the whole room.
Add Under-Cabinet LEDs
Once you’ve separated ambient and task lights, add under-cabinet LED strips to erase counter shadows and make a small kitchen feel instantly brighter.
Mount strips toward the front of the cabinet base so light lands where you chop, read labels, and plate food. Choose a high-CRI (90+) warm-neutral white (3000–4000K) so ingredients look true, not gray or overly yellow.
For tight spaces, use slim tape lights with adhesive backing and clip-on supports at corners. Hide the driver in an upper cabinet or above the fridge, and route cables along cabinet seams for a clean look.
Hardwire if you can; otherwise, a plug-in kit works. Under cabinet LEDs deliver focused kitchen task lighting without stealing counter space.
Use Dimmers For Flexibility
Because small kitchens need to switch from prep mode to dinner mode in seconds, dimmers give you that flexibility without adding a single inch of clutter. Put your overhead fixture on a wall dimmer so you can jump from bright chopping light to a softer glow for meals.
Pair it with your under-cabinet LEDs on a separate switch, and you’ll get true layered lighting without extra hardware on counters. Choose a slim, decora-style control or a smart dimmer if you want app scheduling.
Look for broad dimming options and smooth, flicker-free performance, especially with LEDs. Aim for 2700–3000K bulbs for warmth. With quick sliders or presets, you gain mood control while keeping the kitchen visually clean.
Use Color to Make a Small Kitchen Look Bigger
Two smart color choices can instantly make your small kitchen feel larger: keep the palette light and consistent, then use contrast sparingly to guide the eye.
Start with warm whites, pale greiges, or soft sage on walls and cabinets so boundaries blur. Color psychology matters: cool, muted tones recede, while bright, saturated colors advance and can visually crowd the room.
Try monochrome schemes—one hue across cabinetry, backsplash, and trim—then vary sheen for definition: matte walls, satin cabinets, glossy tile. Match counters to the dominant tone to reduce hard breaks.
Limit dark accents to one or two predictable spots (hardware, faucet, stool legs) so they frame the space without chopping it up. Keep patterns small and low-contrast for towels and rugs.
Use Vertical Space for Decor and Storage
Look up and use your wall space so your counters stay clear and your essentials stay within reach. Install floating shelves for everyday dishes and decor.
Hang wall-mounted racks for mugs, utensils, or pans. Add over-cabinet storage for rarely used items, baskets, or trays so you don’t waste that top gap.
Install Floating Shelves
When counter space disappears fast, floating shelves let you shift everyday essentials and decor up the wall instead of spreading them across crowded surfaces. Mount them above the backsplash or next to the fridge so you can grab what you use daily without digging through cabinets.
Choose a shallow depth (6–8 inches) to prevent visual bulk, and leave 12–15 inches between shelves for tall bottles or canisters. Anchor into studs or use heavy-duty toggles so you don’t worry about sagging.
Group items by purpose: oils and spices together, mugs near the coffee setup, and a small plant or framed print to soften hard lines. Add under-shelf lighting to brighten prep zones.
If you’re planning wall mounted racks later, keep shelf spacing clear for future installs.
Hang Wall-Mounted Racks
If you need more storage but can’t spare another inch of counter space, hang wall-mounted racks to keep essentials and decor in easy reach. Mount them near prep zones so you’ll actually use them: a rail with hooks for utensils, a narrow spice rack by the stove, or a small shelf-and-rod combo for towels and tools.
Choose slim profiles so you don’t bump them, and leave enough clearance to grab items one-handed. Corral similar items in matching jars or canisters to reduce visual clutter and boost kitchen organization.
Add a tiny plant or framed recipe to soften the look, but keep most space functional. Use strong anchors, align with grout lines, and wipe weekly to prevent grease buildup.
Add Over-Cabinet Storage
Although most people ignore the gap above their upper cabinets, you can turn it into hard-working storage that also doubles as decor. Start by measuring the clearance to the ceiling and choosing matching baskets, lidded bins, or slim crates so everything looks intentional.
Group items by category—rarely used bakeware, party platters, or bulk pantry goods—and label the fronts for quick grabs. Keep heavier pieces near the cabinet edges so you can lift them down safely.
Add a small step stool nearby, and line the cabinet tops with a wipeable mat to catch dust. If the gap looks messy, hide it with decorative valances while still leaving access.
Smart Over cabinet storage frees counters and cabinets.
Pick Decor That Doubles as Organization
Because every inch counts in a small kitchen, choose decor that earns its keep by storing, sorting, or freeing up counter space. Start with decorative storage you’ll actually use: lidded canisters for staples, a slim tray to corral oils, and a handled caddy for coffee or tea.
Swap a bulky knife block for a magnetic strip, and hang mugs on under-shelf hooks to clear cabinets. Add multifunctional accessories like a cutting board that fits over your sink, nesting bowls, and stackable bins sized to your shelves.
Use a wall rail with S-hooks for utensils and a small basket for towels. Keep labels consistent so you can find items fast and restock without digging.
Add Bold Accents Without Visual Clutter
When you want a punch of personality in a small kitchen, concentrate bold color or pattern into one tight zone instead of scattering it everywhere. Try a single statement backsplash behind the range, a vivid runner in front of the sink, or two open shelves styled in one palette.
Keep surrounding surfaces quiet: solid cabinet fronts, minimal counter items, and matching hardware prevent visual clutter. Choose one “hero” finish, then repeat it in two small echoes, like canisters, dish towels, or a utensil crock.
Use vertical spots for Bold accents—art above the trash pullout, a bright peg rail, or a magnetic knife strip—so counters stay clear. Stick to odd numbers, and stop at three focal pieces total.
Conclusion
When your small kitchen feels tight, you don’t need a remodel—you need a plan worthy of Da Vinci’s sketches: purposeful, pared back, precise. Set priorities, then layer task and ambient light to open the room. Keep one calm palette, repeat finishes, and let a single “hero” piece lead. Go vertical with shelves and hooks, and choose tools that store and style. Add bold accents sparingly, so every inch earns its keep.