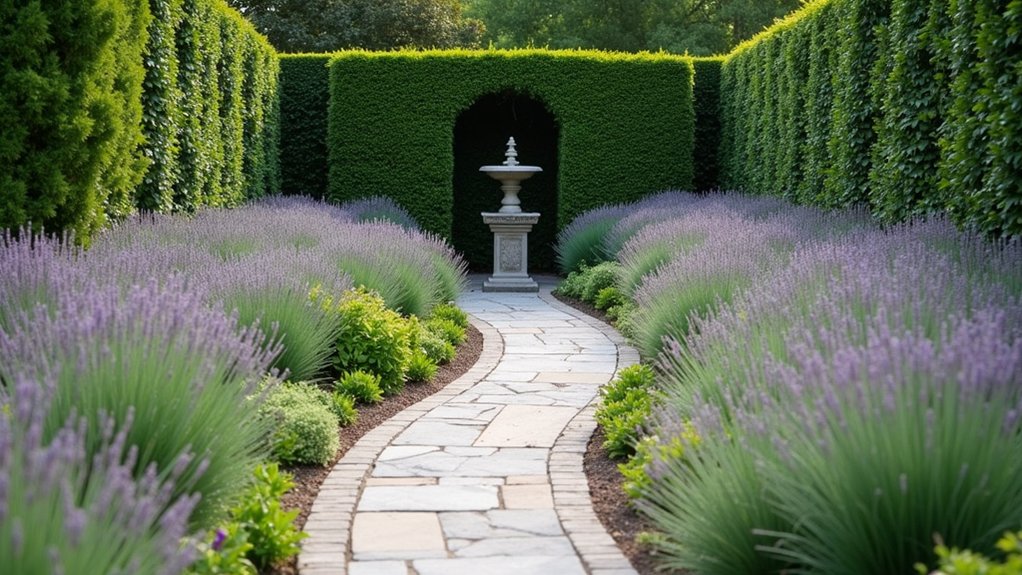

You can give your garden better flow by watching how you actually move through it, not how you think you should. Notice where you hesitate, squeeze past pots, or hit a dead end, then sketch a quick map of routes and pause points. From there, you can widen key paths, clear clutter, and set a focal point where choices happen. The biggest improvements often come from one overlooked spot…
Find Flow Breaks: Bottlenecks, Dead Ends, Clutter
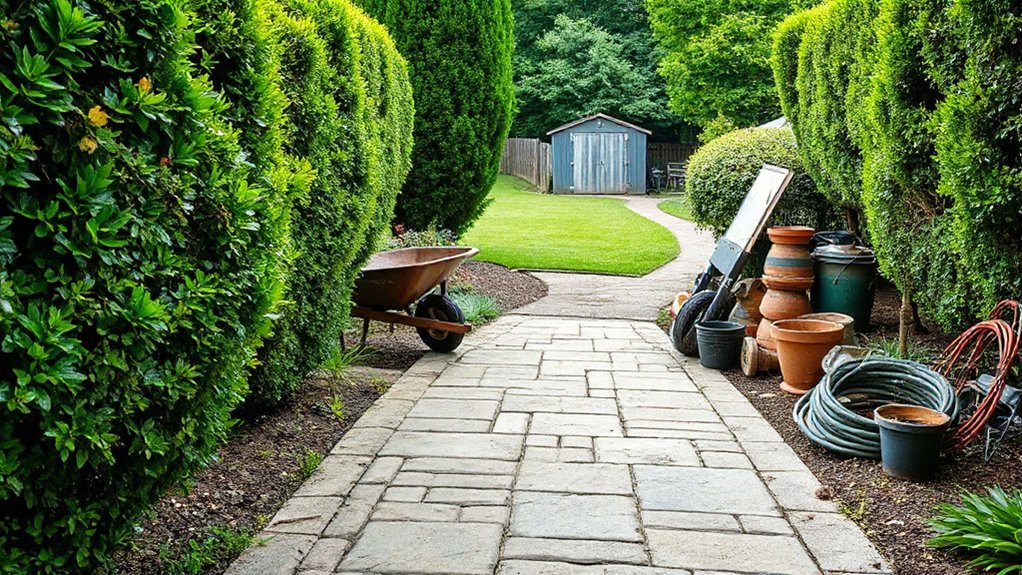
Before you add new paths or beds, walk your garden the way you actually use it and look for “flow breaks”—spots that slow you down, stop you cold, or make you detour. Notice bottlenecks where two people can’t pass, where hoses snag, or where a gate swings into traffic. Flag dead ends that force you to backtrack with tools or a watering can.
Scan for obstruction points: low branches at face height, leaning pots, wobbly edging, or steps that don’t read clearly. Then reduce visual clutter that makes navigation feel busy—too many small containers, mixed materials, or scattered décor.
As you walk, jot what you carried and where you paused; those moments reveal what needs clearing, widening, or simplifying.
Sketch a Simple Flow Map (Routes + Pauses)
Once you’ve spotted the trouble spots, sketch a quick “flow map” of your garden on paper—nothing fancy, just the main routes you take and the places you naturally stop. Draw the house doors, gate, shed, compost, bins, and key beds, then trace your most common loops with a bold line. Mark “pause points” with dots: where you water, harvest, prune, or sit.
Next, layer in functional notes. Add arrows for sun and prevailing wind, and label areas that stay soggy or dry so you can align garden irrigation with actual movement.
Circle spots where you routinely amend or mulch; those pauses often signal soil fertility needs and storage gaps.
Finally, note any frustrating detours or backtracking—you’ll use this map to prioritize fixes later.
Upgrade Paths: Width, Surface, Destinations
Because your routes are already mapped, you can now make each path feel effortless by sizing it for real use, choosing a stable surface, and aiming it at clear destinations.
Set primary walks at 36–48 inches so two people can pass; keep secondary paths 24–30 inches for solo trips. Widen at gates, steps, and working areas to prevent bottlenecks.
Choose surfaces that match traffic: compacted gravel for drainage, pavers for clean edges, mulch for quiet, low-cost loops. Add edging so materials don’t migrate into beds.
Make every path end at something purposeful: a bench, compost bin, shed door, hose spigot, or dining spot.
Use pathway illumination for safe evening loops, and plant seasonal color at nodes for easy orientation.
Use Sightlines to Pull You Forward
Even if your paths are perfectly sized and surfaced, they won’t feel inviting unless your eye has somewhere to go. Create clear sightlines that aim at a destination, so you’re naturally pulled forward.
Stand at each entry and choose one anchor—an urn, a specimen shrub, a bench, or a doorway view—then keep it visible as you move. Trim or relocate plants that block the line, and use taller forms to frame it rather than interrupt it.
Build visual hierarchy by making your main anchor bolder than secondary stops, so the route reads instantly. Check focal alignment from multiple heights: standing, seated, and from indoors.
When the sightline holds, your garden feels effortless to navigate.
Repeat Hardscape Materials for Cohesion
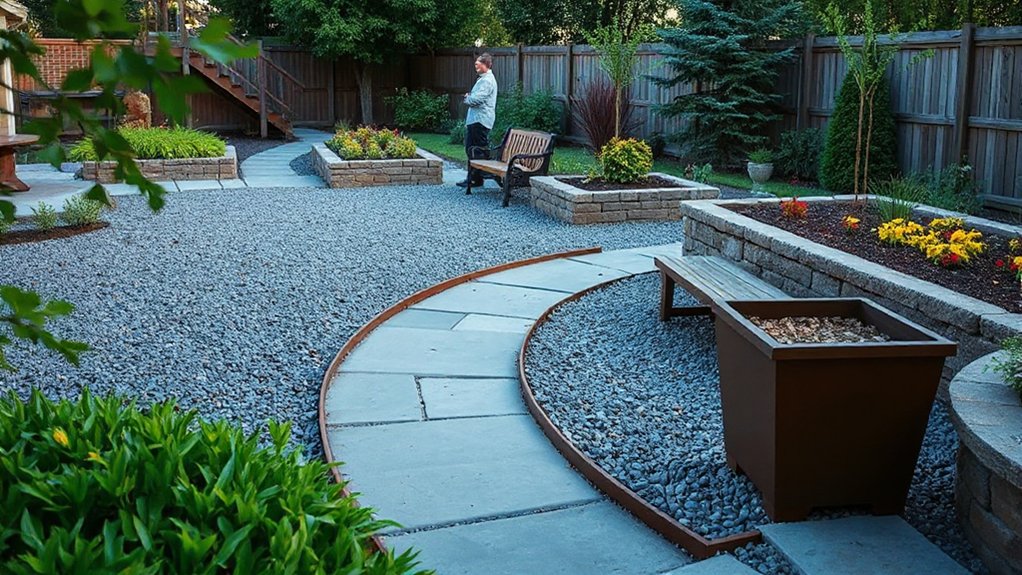
A strong sightline gets you moving, but repeated hardscape materials keep the journey feeling unified.
Choose one primary paving surface—brick, bluestone, decomposed granite—and run it through key routes: the main path, a small landing, and the patio edge.
Then repeat a secondary material in smaller doses, like matching caps on low walls or the same gravel in joints, so progression feels intentional.
Use hardscape contrast sparingly: pair smooth pavers with a rough stone border, or warm brick against cool steel edging, but keep proportions consistent.
You’ll get material variety without visual clutter if you limit yourself to two or three finishes across the whole garden.
Finally, match thicknesses and joint patterns so every segment reads as part of one system.
Echo Plant Color and Texture Across Beds
Once your hardscape reads as one system, you can carry that same cohesion through the planting by echoing a few key colors and textures across separate beds. Pick two or three dominant hues—say white, deep purple, and soft chartreuse—and repeat them in every zone through flowers, foliage, or even stems. This creates color harmony without forcing every bed to match.
Then repeat a handful of plant “finishes.” Pair fine leaves (ornamental grasses, threadleaf coreopsis) with bold ones (hosta, ligularia) in multiple locations to establish texture contrast.
Keep the ratios consistent: if one bed is 70% green structure with 30% accent color, mirror that balance elsewhere. You’ll get unity, yet each bed can feature different species and bloom times throughout the season.
Soften Edges With Curves and Layered Planting
When you trade sharp bed lines for gentle curves, your eye moves through the garden instead of stopping at every edge. Lay out arcs with a hose, then cut beds wide enough to hold plants in drifts, not single-file rows. Keep curves purposeful: repeat the same radius, and let paths and borders mirror each other.
Build depth with layered planting. Put taller shrubs and grasses in back, midheight perennials in the middle, and low groundcovers at the edge to blur the boundary. Tuck a few spillers over stone or mulch to soften hard lines.
Add garden art where a curve turns to create a subtle pause without a visual wall. Mixed layers also deliver wildlife benefits by offering shelter, nectar, and seed sources year-round.
Create Smooth Transitions Between Garden Rooms
To make separate garden rooms feel connected, you need clear pathway links and sightlines that gently pull you forward. You can angle paths toward focal points, frame openings with plants, and keep key views open so each space hints at the next.
Then you’ll tighten the flow by repeating hardscape materials and a few signature plants, so the progression reads as intentional, not abrupt.
Pathway Connections And Sightlines
Although each garden “room” can have its own personality, you’ll only feel that flow if the paths and sightlines connect them on purpose. Start by tracing how you actually move: from door to patio, patio to lawn, lawn to veg bed. Align paths with natural desire lines, then soften any hard turns with gentle curves or a small landing where you can pause and reorient.
Next, manage what you see as you walk. Frame a focal point at the end of a path—a bench, birdbath, or sculptural shrub—so your eye pulls you forward. Use staggered openings and partial screens to reveal the next space gradually, improving garden aesthetics and easing seasonal progressions as views shift through the year.
Keep widths consistent, and avoid dead ends without a clear destination.
Repeating Materials And Plantings
A simple way to make separate garden rooms feel connected is to repeat a few key materials and plantings from one space to the next. Use the same paver or gravel in multiple zones, echo a fence stain, or carry one metal finish through edging, planters, and lighting for Material harmony. Even small repeats, like matching caps on raised beds, create continuity without forcing sameness.
For Plant repetition, pick two or three reliable performers and thread them through borders: the same boxwood form, a signature grass, or one flowering perennial in recurring drifts. Vary height and spacing to suit each room, but keep the plant palette consistent.
Anchor links with a repeated container style or a paired shrub at entrances to pull spaces together.
Place Focal Points Where Decisions Happen
When you reach a fork in the path, step off the patio, or round a corner, your eyes look for a cue to decide where to go next. Give that moment a clear destination by planning focal point placement at the exact spot you pause and choose.
Treat these pauses as decision zones: path intersections, gate openings, steps, and the edge where lawn meets beds. Aim a view straight through them with a bench, urn, small tree, bold container, or a clipped shrub with strong form. Keep the focal point sized to the distance and framed by repeated plantings so it reads instantly.
Place lighting or a contrasting texture behind it to hold attention after dusk. As you guide the gaze, you’ll guide the feet, and movement feels effortless.
Quick Fixes for Common Flow Mistakes
Even if your planting plan looks great on paper, a few predictable snags can make the space feel choppy underfoot. Start by widening pinch points: paths should let two people pass, and turns should feel generous, not abrupt. If you’ve scattered too many small beds, merge them into fewer, larger shapes so your eye travels smoothly.
Fix “dead-end” walks by adding a destination—a bench, pot, or focal shrub—so movement feels intentional. Tame visual clutter by repeating two or three materials and limiting plant varieties per zone.
Check your garden lighting: place low, even lights along primary routes and highlight key junctions. Finally, adjust irrigation systems so hose drags and wet patches don’t block circulation; relocate heads, add drip lines, and define dry edges.
Conclusion
Once you start watching how you actually walk your garden, you’ll notice a funny coincidence: the spots you avoid are the same places guests hesitate. Fix those flow breaks first—clear clutter, widen tight paths, and give every route a clear “why” with a seat, gate, or view. Aim a sightline toward a focal point right where choices happen. Repeat materials, soften edges with curves, and your garden will quietly guide you, step by step.