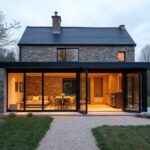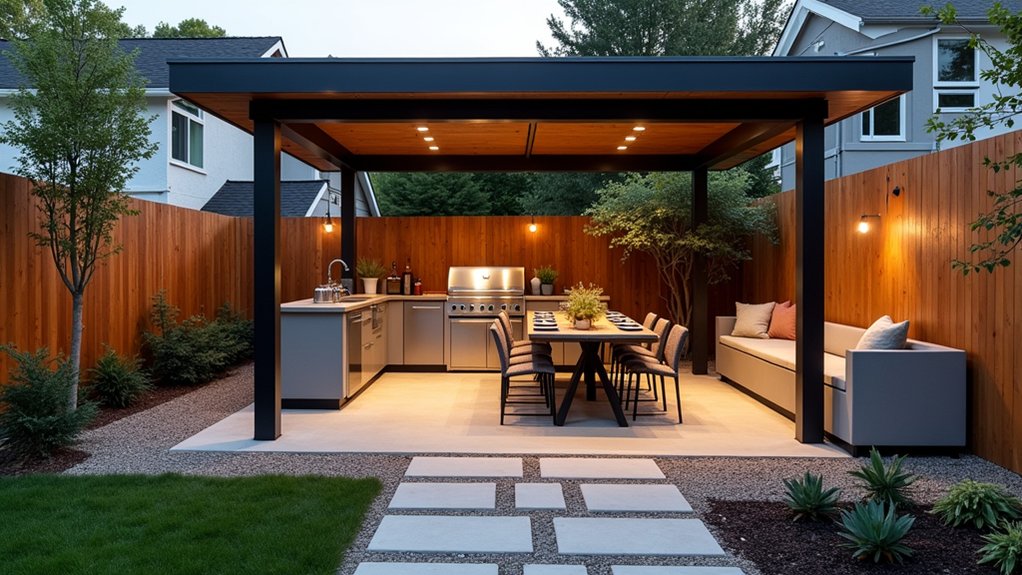

If you want an outdoor space that works as hard as it looks good, you’ve got to plan it around how you actually live. You can map your routines to zones for cooking, dining, lounging, and play, then connect them with durable flooring and clear paths. Add modular seating, real shade, layered lighting, and built-in storage so clutter doesn’t win. The next step is where most yards fall apart…
Map Your Daily Routines to Outdoor Features
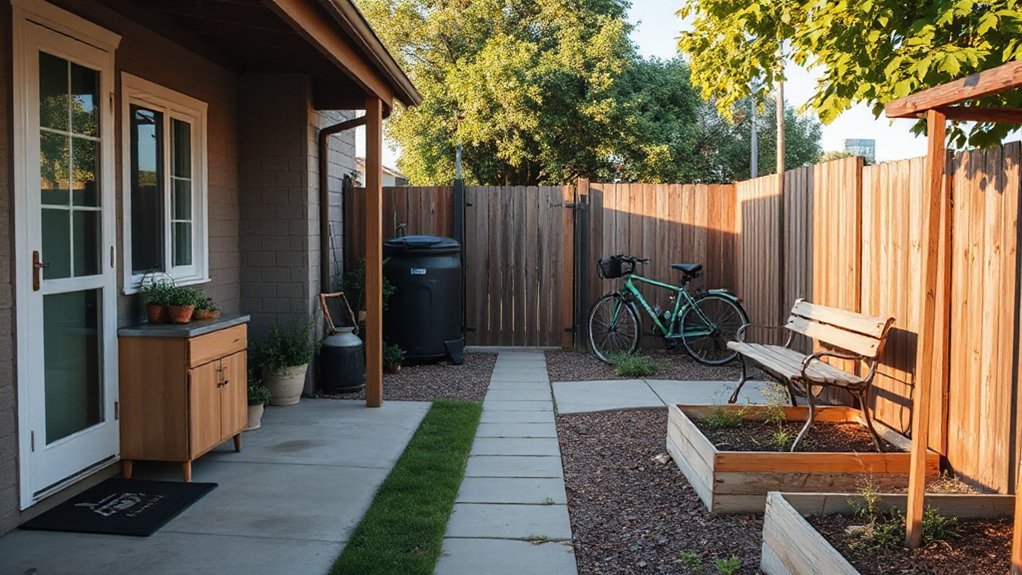
Before you pick materials or plant palettes, track how you actually move through a normal day and let that drive the layout. Note where you step out with coffee, where deliveries land, and which door you use when you’re carrying groceries or sports gear.
Then match features to habits: add a slip-resistant path on your most-used line, place a hose bib where you’ll rinse muddy shoes, and set lighting on motion sensors along late-night routes.
For trend-aware Outdoor aesthetics, keep hardscape edges clean and pair them with layered, low-maintenance planting. Apply core landscaping principles—sightlines, drainage, and circulation—so daily traffic doesn’t kill turf or erode beds.
Finally, plan storage access so tools stay handy, not hidden.
Divide Your Outdoor Space Into Activity Zones
You’ll get more day-to-day use out of your yard when you carve it into purposeful zones—dining, lounging, cooking, play, or a quick workout corner—based on what you actually do.
Plan movement with clear pathways and sightlines so traffic flows naturally from the house to each zone without cutting through the “stay-put” areas.
Balance shared hangout space with a more private nook using planters, screens, or low hedges so you can host and recharge in the same footprint.
Define Purposeful Outdoor Zones
If your yard tries to do everything at once, it usually ends up doing nothing well, so define purposeful zones that match how you actually live outdoors.
Start by listing your top three uses: dining, lounging, play, gardening, or pets. Give each use a clear footprint and a “job,” like shade for a seating nook or a flat surface for a grill station.
Use landscape design cues to separate areas without fencing: a change in ground material, a low hedge, or a planter edge.
Keep garden aesthetics intentional by repeating one material or color across zones, then vary texture with lighting, cushions, and containers.
Trends favor flexible zones, so add movable stools, modular benches, and a compact bar cart.
Plan Movement And Pathways
Three well-placed pathways can make a small yard feel larger and a busy yard feel calmer: one primary route from the house to your main zone, plus secondary connectors to dining, garden, or play areas.
Size paths to how you’ll move: 48 inches for two people passing, 36 for single-file, and step-stones only for low-traffic shortcuts. Keep routes legible with consistent edging, then vary surface materials to cue activity zones without adding walls.
In landscape design, use gentle curves to slow the pace near seating, and straighter lines to speed access to tools, bins, or grills.
Add low, glare-free lighting at turns and thresholds. You’ll protect turf, reduce mud, and sharpen outdoor aesthetics year-round.
Blend Shared And Private Areas
Once your pathways set the flow, define where that movement lands by zoning the yard into shared and private pockets. Anchor social areas near the house for easy serving, power access, and quick cleanups. Use a dining pad or gravel terrace, then shift to a lounge node with a fire table or modular seating.
Create privacy zones deeper in the lot or off to one side, and soften the passage with layered screening: slatted wood panels, tall planters, or fast-growing hedges. Aim for partial enclosure, not a bunker—leave sightlines for safety and breeze.
Add task lighting to social areas and warmer, lower lighting in privacy zones. Keep each zone’s surface consistent, and repeat materials so the yard feels intentional, not chopped up.
Pick Outdoor Flooring That Takes a Beating
Because patios and paths get blasted by sun, rain, grit, and foot traffic, your outdoor flooring has to prioritize durability over looks alone. Start with Durable materials: porcelain pavers, sealed concrete, composite deck boards, or dense natural stone like granite. Skip soft limestone in freeze-thaw zones, and avoid slick polished surfaces near pools.
Match the build to your climate and use. Choose thick pavers with a compacted base for high-traffic routes, and specify slip-resistant textures (look for DCOF ratings). Protect surfaces with Weather resistant finishes: UV-stable sealers, penetrating stone treatments, or factory-capped composites that won’t splinter.
Add proper slope and drainage gaps so water can’t pond, stain, or heave. Your floor should work hard, year-round.
Use Modular Seating for Quick Layout Changes
Keep your patio functional by choosing modular seating you can reconfigure in minutes—an L-shaped sectional tonight, separated lounge chairs tomorrow.
Mix-and-match armless chairs, corners, and ottomans so you can scale seating for guests without buying a whole new set.
For smaller spaces, pick modular benches with hidden storage to stash cushions, throws, or outdoor games when you’re done.
Rearrangeable Sectionals For Flexibility
Whether you’re hosting a crowd or carving out a quiet corner for two, rearrangeable outdoor sectionals let you change your setup in minutes instead of buying more furniture. Treat them as flexible furniture: slide a corner piece to open a walkway, pull sections apart for solo loungers, or push them tight for a conversation pit.
You’ll get adaptable layouts that keep pace with dinner parties, movie nights, and work-from-home afternoons. Choose frames in powder-coated aluminum or FSC-certified teak, then look for quick-dry foam and solution-dyed acrylic covers so sudden rain doesn’t derail plans.
Add a lightweight ottoman that doubles as a table with a tray, and use non-slip furniture pads to keep pieces aligned on pavers or decking.
Mix-And-Match Seating Modules
When your patio has to pivot from coffee-for-one to seats-for-six, mix-and-match seating modules let you reconfigure the space fast without dragging out extra chairs. You’ll get versatile seating by pairing armless chairs, corner pieces, and low ottomans that double as perches or footrests.
Choose customizable modules with clip-together brackets or weighted connectors so sections don’t drift when people stand up. Keep seat heights consistent across pieces to avoid awkward transitions, and look for quick-dry foam with removable covers for real-world spills.
For a trend-forward look, mix one textured fabric with a solid performance weave, then anchor the setup with a slim outdoor rug sized to your “largest layout.” Add one lightweight side table per two seats for drinks and phones.
Storage-Friendly Modular Benches
Although a full bench reads “built-in,” modular versions give you the same streamlined look with hidden storage and quick layout swaps. Choose modular benches with lift-top seats or slide-out bins to stash cushions, citronella, and kids’ toys without adding a deck box.
For weather, look for marine-grade polymer or powder-coated aluminum frames and quick-drain interiors.
Place two units as an L for dining overflow, then split them into singles for a fire-pit circle when guests arrive. Add a backrest module only where you’ll lounge, and keep armless cubes for flexible perching.
Label bins, use washable liners, and store grouping pieces by task—grilling, games, gardening—to keep outdoor organization effortless all season.
Add Shade That Drops the Temperature
How much cooler can your patio feel with the right shade? Start with Shade solutions that block high-angle sun: a cantilever umbrella, a retractable awning, or a modern pergola with adjustable louvers.
Position coverage on the west and south sides to cut late-day heat, then add outdoor-rated shade cloth (80–90% UV block) where glare persists.
For better temperature control, pair shade with airflow: mount a ceiling fan under a covered structure or place an oscillating fan where you sit.
Light-colored canopies reflect heat; dark fabrics run hotter.
Trend-wise, motorized awnings and louvered roofs integrate with smart controls, so you can chase shade as the sun shifts daily.
Hide the Clutter With Built-In Outdoor Storage
Shade keeps your patio cooler, but the space won’t feel finished if cushions, pool toys, and tools end up in a pile. Build storage into what you already use: a bench with lift-up seats, a raised planter with a hinged lid, or a low retaining wall that opens from the top.
For true Hidden storage, match door faces to your cladding so it reads like architecture, not a plastic bin.
Make clutter management effortless by placing compartments where mess happens—near the gate for yard tools, beside seating for throws, by the pool for floats. Add weather gaskets, vent holes, and a sloped base so water drains.
Use marine-grade hinges and stainless hardware, and label bins inside for quick resets.
Set Up a Cooking and Serving Zone
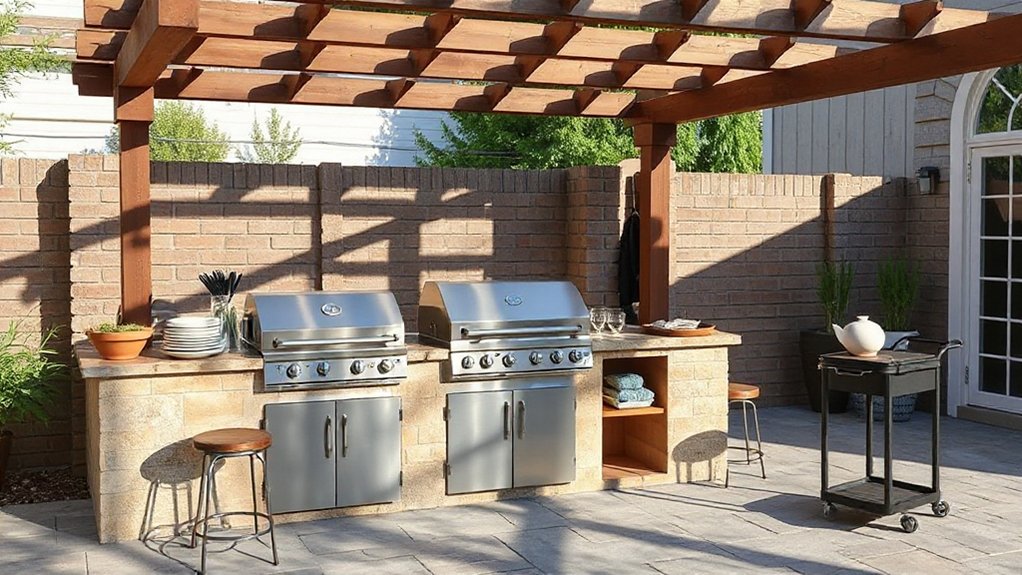
When you treat outdoor cooking like a real workstation, you’ll grill more often and keep traffic out of the prep area. Anchor the zone with your grill, then add a heat-safe prep counter within one step, plus a small landing surface for trays. Keep Cooking essentials close: tongs, thermometer, skewers, spice rubs, oil, and a covered bin for trash and recycling.
Create a clear serving line that runs away from the flame. A bar-height ledge or movable cart lets you plate, pour, and pass without crowding the cook. Stock it with Serving accessories: melamine platters, condiment caddies, insulated pitchers, and a slim cooler for drinks.
Choose stainless, sealed concrete, or teak for weather resistance, and add hooks for towels and utensils. Mark zones with durable outdoor rugs.
Layer Path, Task, and Ambient Outdoor Lighting
After you’ve dialed in your cooking and serving setup, lighting determines whether you’ll actually use it after sunset. Start by placing low-glare path lights 6–8 feet apart, aimed down to prevent hotspots and keep sightlines clean. Layer path, task lighting, and ambient glow so each area does one job well.
For task lighting, mount adjustable sconces or a slim LED bar over the grill, prep counter, and beverage station; choose 2700–3000K for accurate color without harshness. Add dimmable string lights or a shielded wall wash for ambient fill, then control it all with smart switches, timers, or motion sensors.
Look for wet-rated fixtures, dark-sky friendly lenses, and consistent finishes so the setup feels intentional, not piecemeal.
Kid- and Pet-Proof Your Outdoor Space
Because you’ll use the space more often if you’re not constantly policing it, kid- and pet-proofing should be part of the design—not an add-on. Start with durable fencing that’s climb-resistant, chew-resistant, and properly latched; add a self-closing gate if kids bolt or dogs dash. Keep picket spacing under 4 inches and avoid horizontal rails that double as ladders.
Choose slip-resistant pavers or composite decking, and cap sharp edging with rounded bullnose. For play zones, use poured-in-place rubber or pea gravel in contained bays. Specify child-safe plants and skip toxic favorites like oleander, foxglove, or sago palm.
Hide hoses and cords, lock storage, and anchor grills. You’ll relax more, and the space will last.
Conclusion
When you design outdoors around how you actually live, your yard stops being a picture frame and starts acting like an extra room. Map routines, carve clear zones, and choose tough flooring and modular seating so plans can pivot fast. Cool things down with shade, then hide the mess in built-ins. Add a tight cooking station and layered lighting to keep evenings humming. Finish by child- and pet-proofing—it’s function you’ll feel daily.