Covering bathroom wall tiles is an effective way to refresh the look of your bathroom without the need for an expensive renovation. Whether you want to change the color, hide imperfections, or just update the style, there are several easy methods to achieve this. In this article, we’ll explore seven simple and cost-effective ways to cover bathroom wall tiles.
Explore the Contents
Preparing Your Bathroom
Before you start any tile covering project, it’s essential to prepare your bathroom. Remove all personal items, fixtures, and accessories to ensure a clean and clear workspace. Cover the floor and any remaining fixtures with protective materials to prevent damage during the process.
Selecting the Right Tiles
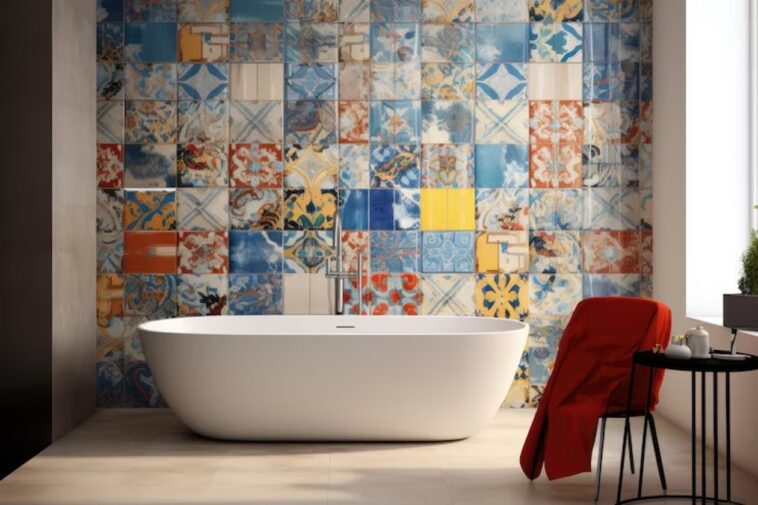
When it comes to covering your bathroom wall tiles, one of the first and most crucial steps is selecting the right tiles for the job. The choice of tiles can significantly influence the outcome of your project, affecting both the aesthetics and durability of your bathroom walls. Here’s a closer look at the factors to consider when selecting the perfect tiles:
Tile Type: You have several options when it comes to the type of tiles you can use. Some of the common choices include adhesive tiles, peel-and-stick tiles, and traditional ceramic tiles. Each type has its own set of advantages and disadvantages, so it’s important to weigh them against your specific needs.
Style and Design: Consider the style and design you want to achieve in your bathroom. The choice of tiles can drastically impact the overall look and feel of the space. Whether you prefer a classic, modern, or eclectic style, there are tiles available to match your vision.
Color and Texture: Tiles come in a wide range of colors and textures. Think about the color scheme of your bathroom and choose tiles that complement it. Consider the texture as well, as it can add depth and character to your walls.
Size and Shape: Tile size and shape also play a role in the visual impact of your bathroom. Larger tiles can create a sense of spaciousness, while smaller mosaic tiles can add intricate detail. The shape of the tiles can be square, rectangular, or even irregular.
Budget: Tiles can vary significantly in price. Set a budget for your project and try to stick to it. While high-end tiles may be tempting, there are affordable options that offer excellent quality and style.
Maintenance: Consider the level of maintenance you’re willing to commit to. Some tiles require more maintenance than others. For example, natural stone tiles may need periodic sealing, while ceramic tiles are generally low-maintenance.
Durability: Bathroom walls are exposed to moisture and daily wear and tear. Ensure the tiles you select are suitable for wet areas and can withstand the conditions in your bathroom.
Longevity: If you’re planning for a long-term solution, invest in durable and timeless tiles that won’t go out of style quickly. This can save you from needing to redo the project in the near future.
Compatibility: Check the compatibility of the tiles with the existing surface. Some tile types may require specific adhesives or preparation methods to ensure a secure and long-lasting bond.
Read More: 7 Best Bathroom Remodeling Trends in 2023
Cleaning and Repairing the Existing Tiles
Inspect the existing tiles for any cracks, chips, or loose tiles. Clean the surface thoroughly to remove any dirt, grime, or soap scum. Repair any damaged tiles or grout lines before proceeding.
Tile Removal (if necessary)
If you decide to remove the old tiles, carefully pry them off the wall using a chisel or putty knife. Be cautious not to damage the wall surface in the process. Once removed, ensure the wall is smooth and free of any adhesive residue.
Tile Layout and Design
Bathroom Wall Tiles: Plan the layout and design of your new tiles. Consider the pattern and orientation you want to achieve. Measure and mark guidelines on the wall to ensure a precise placement.
Cutting and Fitting Tiles
Bathroom Wall Tiles: If necessary, cut the tiles to fit around corners, fixtures, and edges. A tile cutter or a sharp utility knife can be used for this purpose. Ensure that the tiles fit snugly without any gaps.
Adhesive Application
Apply tile adhesive to the back of each tile or the wall, depending on the type of tiles you’re using. Press the tiles firmly into place, following the guidelines you’ve marked.
Grouting the Tiles
Bathroom Wall Tiles: Once you’ve successfully adhered your chosen tiles to the bathroom wall, the next crucial step is grouting. Grout not only holds the tiles in place but also fills the gaps between them, providing a finished, seamless look. Here’s a step-by-step guide on how to grout your bathroom wall tiles effectively:
Gather Your Materials:
- Tile grout (choose a color that complements your tiles).
- Grout float or rubber grout trowel.
- A bucket of clean water.
- Sponge.
- Grout sealer (optional).
Prepare the Grout:
- Follow the manufacturer’s instructions for mixing the grout. Typically, you’ll add water to the grout powder until it reaches the desired consistency. Stir the mixture thoroughly to ensure it’s lump-free.
Apply the Grout:
- Using a grout float or rubber grout trowel, scoop a generous amount of grout and press it onto the tiles. Hold the tool at a 45-degree angle and spread the grout over the tiles, ensuring the gaps are completely filled.
Work in Sections:
- It’s essential to work in small sections at a time, especially if you have a large wall to grout. This prevents the grout from drying before you can clean the tiles.
Fill the Gaps:
- Press the grout into the gaps between the tiles, making sure there are no air pockets. Use the edge of the grout float to scrape off excess grout from the tile surfaces.
Clean as You Go:
- As you work, have a bucket of clean water and a sponge nearby. After applying grout to a section, dampen the sponge and gently wipe away excess grout from the tile surface. Rinse the sponge frequently to avoid smearing grout on the tiles.
Finish Joints and Edges:
- For corners, edges, and hard-to-reach spots, you may need to use your finger or a grout joint tool to shape the grout and ensure it’s smooth and even.
Allow to Cure:
- Follow the grout manufacturer’s instructions regarding curing time. Typically, it takes 24-48 hours for the grout to set completely. Avoid touching or disturbing the grout during this period.
Optional: Seal the Grout:
- To enhance the grout’s longevity and stain resistance, consider applying a grout sealer. This step can be particularly important if you’re grouting in a bathroom, where moisture is present.
Sealing and Finishing
Bathroom Wall Tiles: To protect your newly covered tiles and ensure their longevity, apply a tile sealer. This will make the tiles easier to clean and maintain over time.
Maintenance Tips
Bathroom Wall Tiles: After covering your bathroom wall tiles, it’s important to maintain them properly. Regular cleaning and inspection will help keep your bathroom looking fresh and appealing.
Read More: Top 13 Smart Bathroom Technology in 2023
Conclusion
In this article, we’ve explored seven easy and practical ways to cover bathroom wall tiles. Whether you’re looking to update your bathroom’s look, hide imperfections, or simply refresh the style, these methods provide a range of options to suit your needs and budget.
We began by discussing the importance of preparing your bathroom before starting any tile covering project. A clear workspace and protective measures for fixtures and accessories are essential to avoid damage.
Cleaning and repairing existing tiles, or even removing them when necessary, ensures a smooth canvas for your new wall covering. Proper preparation is key to a successful outcome
FAQs
Can I cover my bathroom tiles with paint?
Yes, you can paint your bathroom tiles, but it’s important to use a suitable tile paint and follow proper preparation and application steps.
What is the advantage of using peel-and-stick tiles?
Peel-and-stick tiles are easy to install and remove, making them a great option for temporary transformations.
Do I need professional help to cover my bathroom tiles?
While some methods can be DIY projects, seeking professional assistance is recommended for more complex tile covering projects.
How do I choose the right adhesive for my new tiles?
The type of adhesive you need depends on the tile material and your wall surface. Consult with a home improvement expert for guidance.
Is it possible to cover dark-colored tiles with lighter ones?
Yes, it’s possible, but it may require additional preparation and layering to prevent the dark color from showing through.